
Introduction
To fix most sprinkler system issues, start by isolating the problem: check for a clogged nozzle or misaligned spray head, test whether a zone valve or solenoid is failing, and determine whether a cracked lateral or mainline pipe is leaking. Clear debris from clogged heads, replace faulty valves or solenoids, and splice cracked PVC with a slip coupling before pressure testing the repair. A well-maintained irrigation network is the backbone of any healthy landscape. In fact, research shows a well-maintained system can save up to 30% more water compared to a neglected one. When an underground line cracks, an electrical solenoid fails, or heads refuse to pop up, the impact is swift: brown grass, muddy sinkholes, and skyrocketing utility bills.
Whether you manage an HOA in Torrance, a commercial center in Covina, or a family residence in the South Bay, catching malfunctions early protects both your plants and your wallet.
Recognizing Common Signs Your System Needs Sprinkler System Repair
Catching trouble early prevents minor glitches from turning into catastrophic washouts. Most sprinkler failures show visible clues long before an underground pipe bursts completely. If you enjoy hands-on troubleshooting, our guide on sprinkler repair quick and easy covers basic checks, but here are the classic warning signs every property owner should monitor:
- Uneven Spray Patterns and Sputtering Nozzles: If spray heads mist erratically, bubble over, or shoot weak streams, debris may be clogging the filter screen, or the line pressure has dropped.
- Persistent Puddling or Marshy Turf: Standing water near sprinkler heads after a cycle finishes indicates a weeping valve or a broken pipe section beneath the grass.
- Stubborn Heads That Will Not Pop Up or Retract: Grit buildup in the wiper seal or cracked riser stems can trap heads underground or leave them sticking up, creating a hazard for lawnmowers.
- Localized Dry Spots: Random brown patches often mean adjacent spray heads have lost pressure or drifted out of alignment.
- Unexplained Water Bill Spikes: A sudden jump in your municipal water bill almost always points to a hidden subterranean leak.
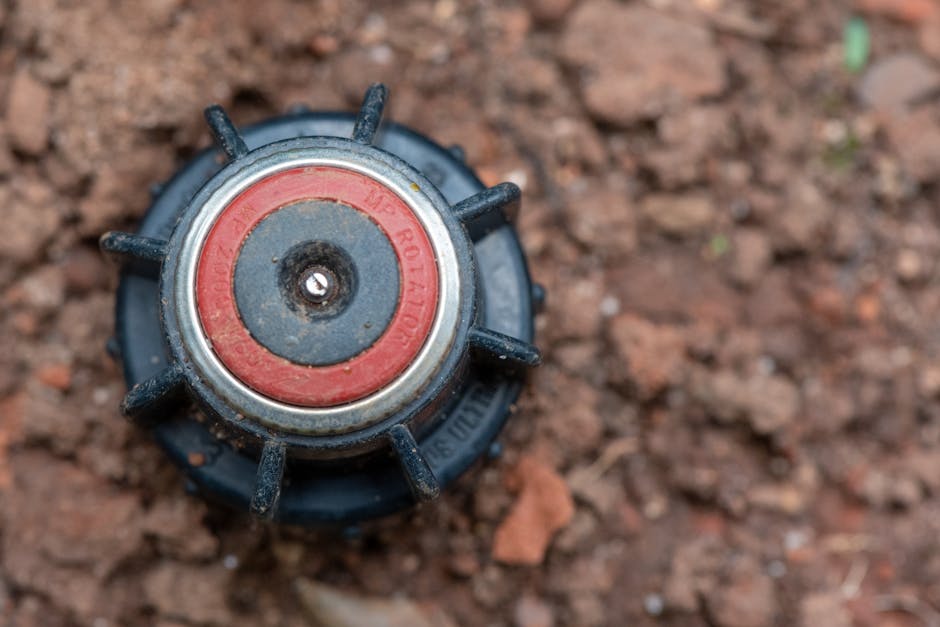
Cracked Mainline vs. Broken Lateral Line
Understanding the anatomy of your system makes diagnosing underground leaks straightforward. Your irrigation network contains two distinct types of piping:
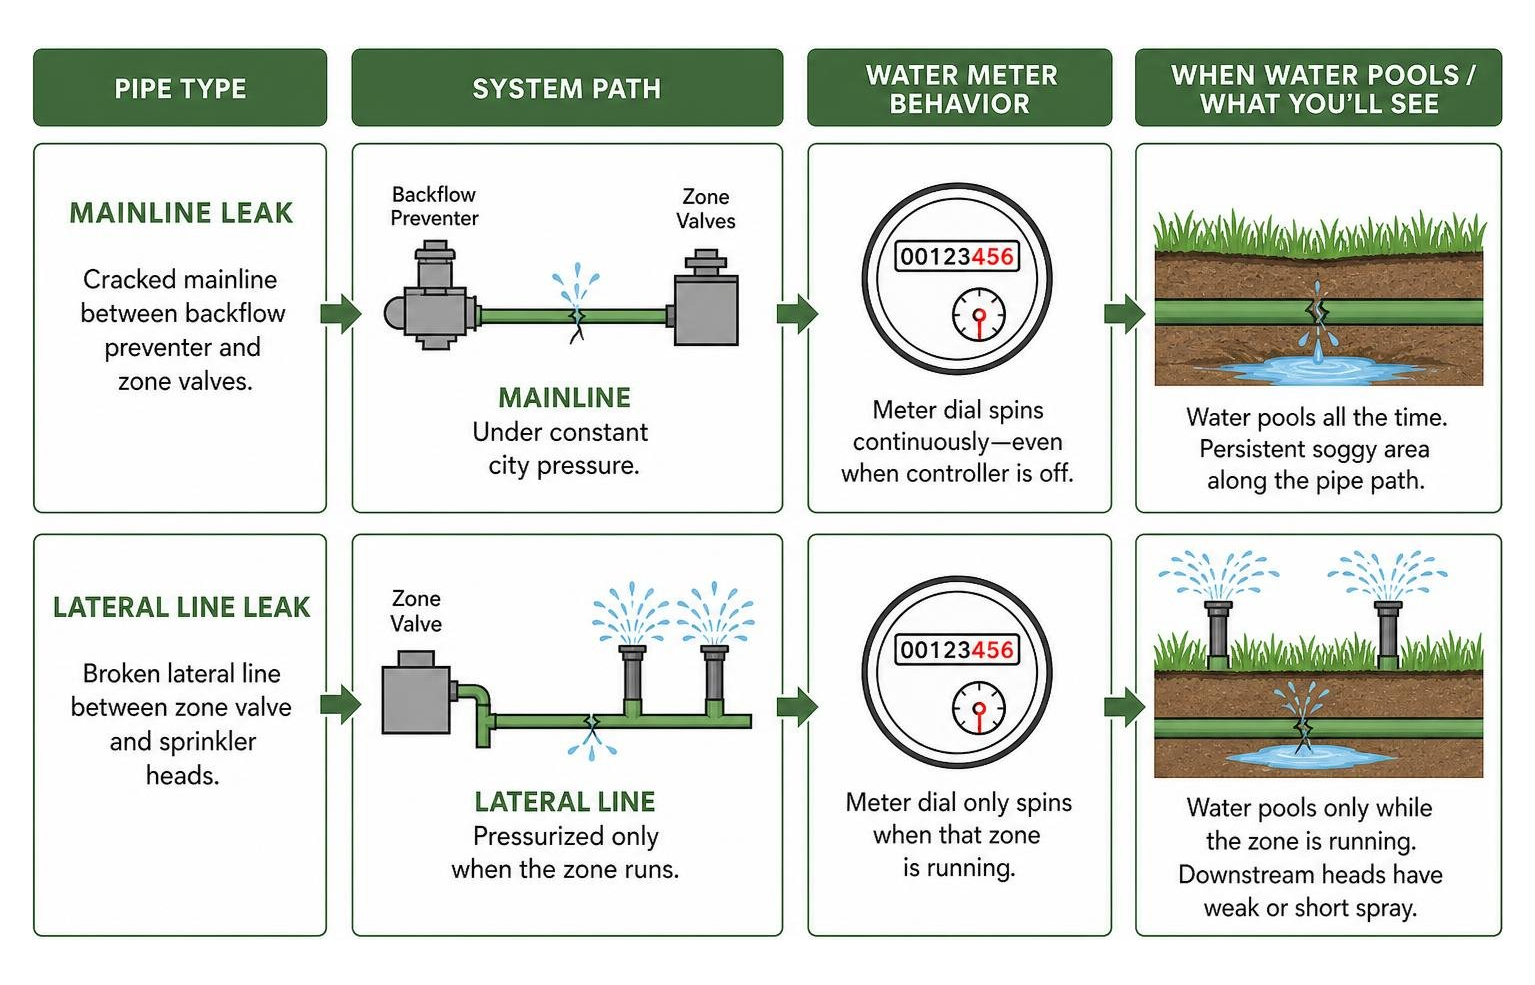
- The Mainline: This pipe runs under constant city pressure from your backflow preventer to each zone valve box. If you have a cracked mainline, water leaks continuously—even when the controller is completely off. You will notice your water meter dial spinning nonstop, and a persistent soggy depression will form in the turf along the pipe path.
- Lateral Lines: These pipes run from the zone control valves out to individual sprinkler heads. Lateral lines only hold water pressure when that specific zone is actively running. If you have a broken lateral line, water will only pool while that station runs, and the heads downstream will suffer a severe drop in spray distance.
Learning the difference helps you decide whether you can handle easily repairing buried sprinkler pipes on a single zone or if you need an immediate shutoff for a pressurized mainline.
Electrical and Controller Malfunctions
Not every irrigation headache comes from cracked plumbing. Electrical faults between your controller and the zone valves cause widespread system failures.
Common electrical issues include:
- Blank or Scrambled Controller Displays: Voltage spikes from seasonal storms can burn out the internal logic board.
- Burned-Out Solenoids: The electromagnetic coil on top of each valve can wear out, preventing the valve diaphragm from opening or closing.
- Corroded Wire Splices: Valve boxes accumulate moisture and soil. Without waterproof wire nuts, copper wiring corrodes, breaking the 24-volt circuit from the timer.
- Skipped Watering Cycles: Faulty rain sensors or severed common wires can trick the system into skipping scheduled run times entirely.
If you suspect wiring trouble, reviewing our guide to wiring your lawn sprinkler system will walk you through tracing common and station wires with a multimeter.
Step-by-Step Sprinkler Pipe and Component Diagnostics
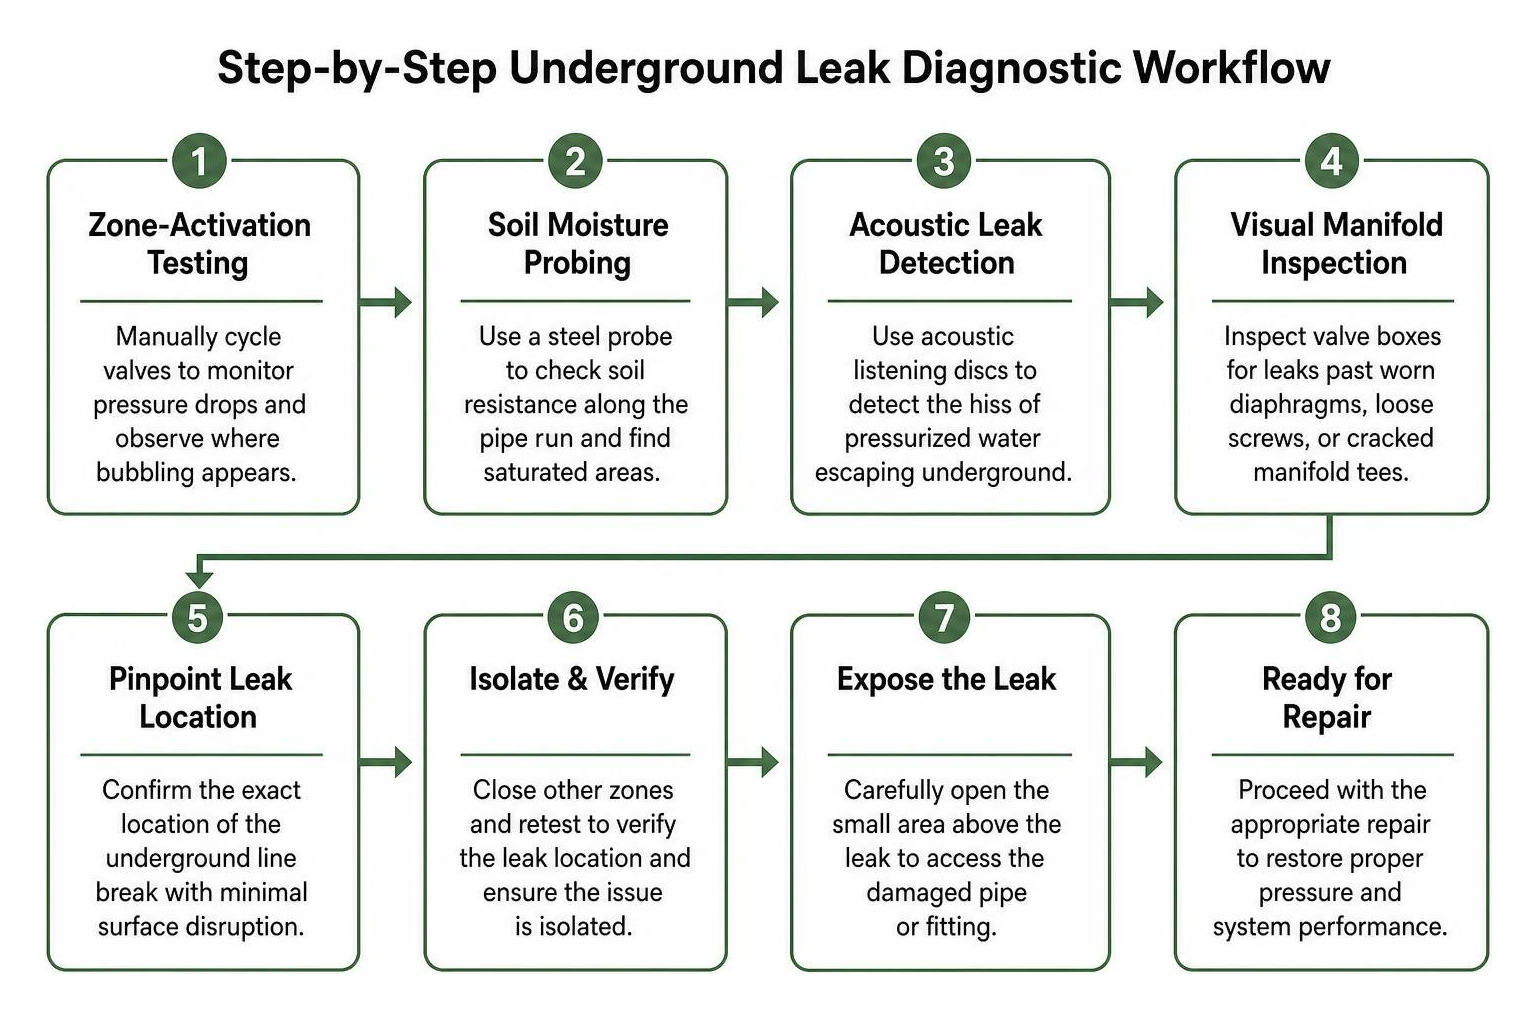
Finding an underground leak does not require turning your manicured lawn into a construction trench. Professional technicians follow a methodical diagnostic sequence to isolate faults with minimal footprint.
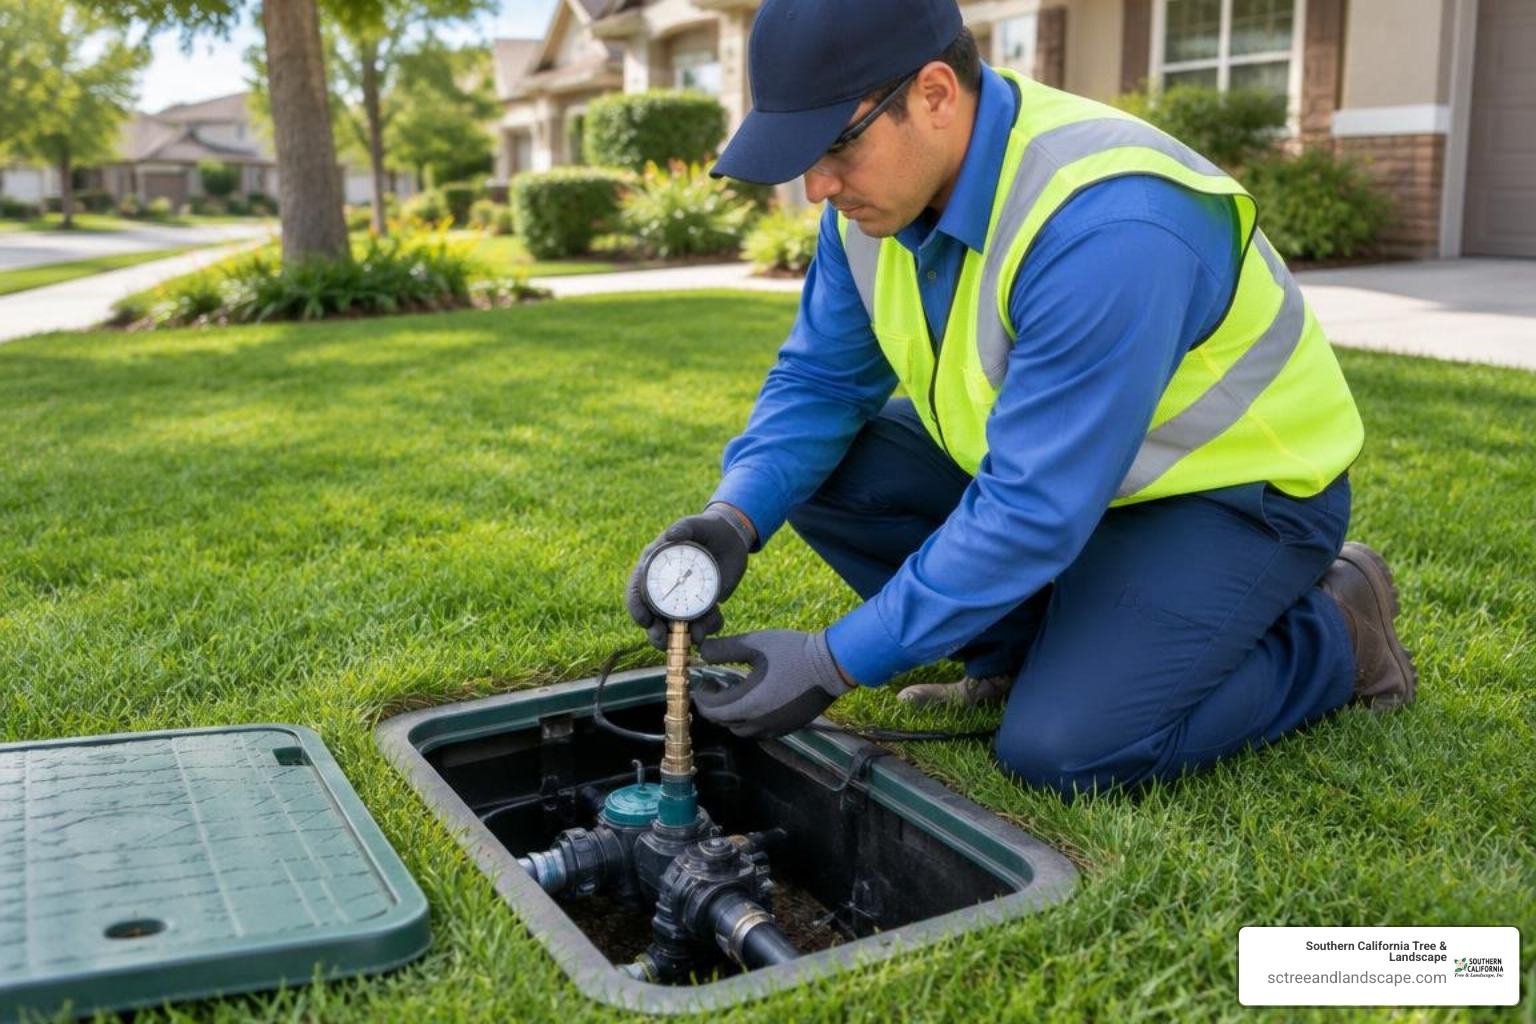
If your landscape mixes turf rotors with micro-irrigation, you may also need to balance main line pressure with low-volume zones. You can learn how to stop the leak and save your garden to keep delicate planting beds from being over-pressurized.
Pinpointing Underground Leaks Without Destroying Turf
To locate hidden line breaks without excavating large sections of turf, experienced technicians rely on targeted detection methods:
- Zone-Activation Testing: Manually cycling individual valves allows technicians to monitor pressure drops and observe where bubbling surface water first appears.
- Soil Moisture Probing: Using a non-destructive steel probe, technicians check soil resistance along the pipe run. Saturated soil offers little resistance, marking the epicenter of the break.
- Acoustic Leak Detection: For deep mainlines beneath hardscapes or decorative turf, acoustic listening discs pick up the distinct hiss of pressurized water escaping underground fittings.
- Visual Manifold Inspection: Opening valve boxes reveals whether water is leaking past worn valve diaphragms, loose bonnet screws, or cracked manifold tees.
The Professional Sprinkler System Repair Process
Once the break is isolated, executing a long-lasting repair requires proper materials and technique:
- Controlled Sod Removal: Technicians carefully cut a clean sod plug and set it aside on a tarp to keep the surrounding grass clean.
- Excavation and Cleaning: Soil is cleared around the damaged section, leaving at least 3 inches of clearance beneath the pipe. The pipe surface is wiped clean of mud and grit.
- Square Cutting: The split section is cut away using a dedicated PVC pipe cutter to ensure clean, burr-free edges.
- Installing Telescopic Couplings or Slip Fixes: Depending on line movement, a heavy-duty slip coupling or flexible repair fitting is fitted into the gap.
- Proper Solvent Welding: Technicians apply purple primer to soften the plastic, followed by medium-body PVC cement. The fitting is joined with a quarter-turn twist and held firmly for 30 seconds to prevent push-out.
- Pressure Testing Before Backfilling: The system is pressurized and run while the trench remains open to verify that the joint holds under full operating pressure with zero weeping.
- Compaction and Sod Restoration: The trench is backfilled, tamped to eliminate air pockets, and the sod plug is placed back at grade level.
When you need factory-grade reliability, working with certified repair experts ensures technicians use genuine components from industry leaders like Rain Bird, Hunter, Toro, and Irritrol rather than sub-par generic parts.
Understanding Sprinkler System Repair Costs and Upfront Pricing
Repair costs depend on whether the issue is a simple above-ground mechanical fix or a deep mainline failure under heavy soil. Knowing average industry benchmarks helps you budget accurately and avoid unexpected fees.
| Repair Type | Average Cost Range | Typical Repair Time | Key Scope of Work |
|---|---|---|---|
| Sprinkler Head Replacement | $50 – $75 | 30 – 45 mins | Replace damaged pop-up body, nozzle, and adjust spray arc |
| Zone Valve Repair / Replacement | $100 – $250 | 1 – 2 hours | Rebuild internal diaphragm, replace 24V solenoid, or swap valve |
| Lateral Pipe Section Repair | $120 – $300 | 1 – 3 hours | Localized excavation, slip coupling installation, pressure test |
| Cracked Mainline Pipe Repair | $200 – $450+ | 2 – 4 hours | Heavy excavation, deep cut-in, heavy-duty pressure fittings |
| Controller / Timer Replacement | $150 – $400+ | 1 – 2 hours | Mount smart Wi-Fi timer, wire valve stations, program cycles |
| Wiring Fault Isolation & Repair | $100 – $300+ | 1 – 3 hours | Wire tracing, locating lost valve boxes, waterproof re-splicing |
If your system is older or frequently breaks down, reviewing our guide on the ballpark cost of a new sprinkler system can help you decide between ongoing repairs and a full system upgrade.
DIY Fixes vs. Hiring a Licensed Technician
Homeowners can often handle simple fixes like replacing a broken pop-up spray nozzle or adjusting an arc with an adjustment key. However, major underground pipe repairs, electrical troubleshooting, and mainline work carry risks if done incorrectly.
| Consideration | DIY Approach | Licensed Professional Service |
|---|---|---|
| Initial Out-of-Pocket Cost | Low (cost of parts & hand tools) | Moderate (labor + commercial-grade parts) |
| Required Equipment | Shovels, hand cutters, glue, primers | Trenchers, wire locators, pressure gauges, diagnostic multimeters |
| Risk of Recurrent Leaks | High (improper glue cure, incorrect slip fits) | Low (properly solvent-welded, factory fittings) |
| Plumbing Code Compliance | Often overlooked (backflow risks) | Guaranteed compliance with local municipal codes |
| Time Investment | Weekend project (4–8+ hours) | 1–2 hours with same-day completion |
| Warranty Protection | None (retail store exchange only) | 12-month workmanship and parts warranty |
Optimizing Watering Schedules to Prevent Future Pipe Damage
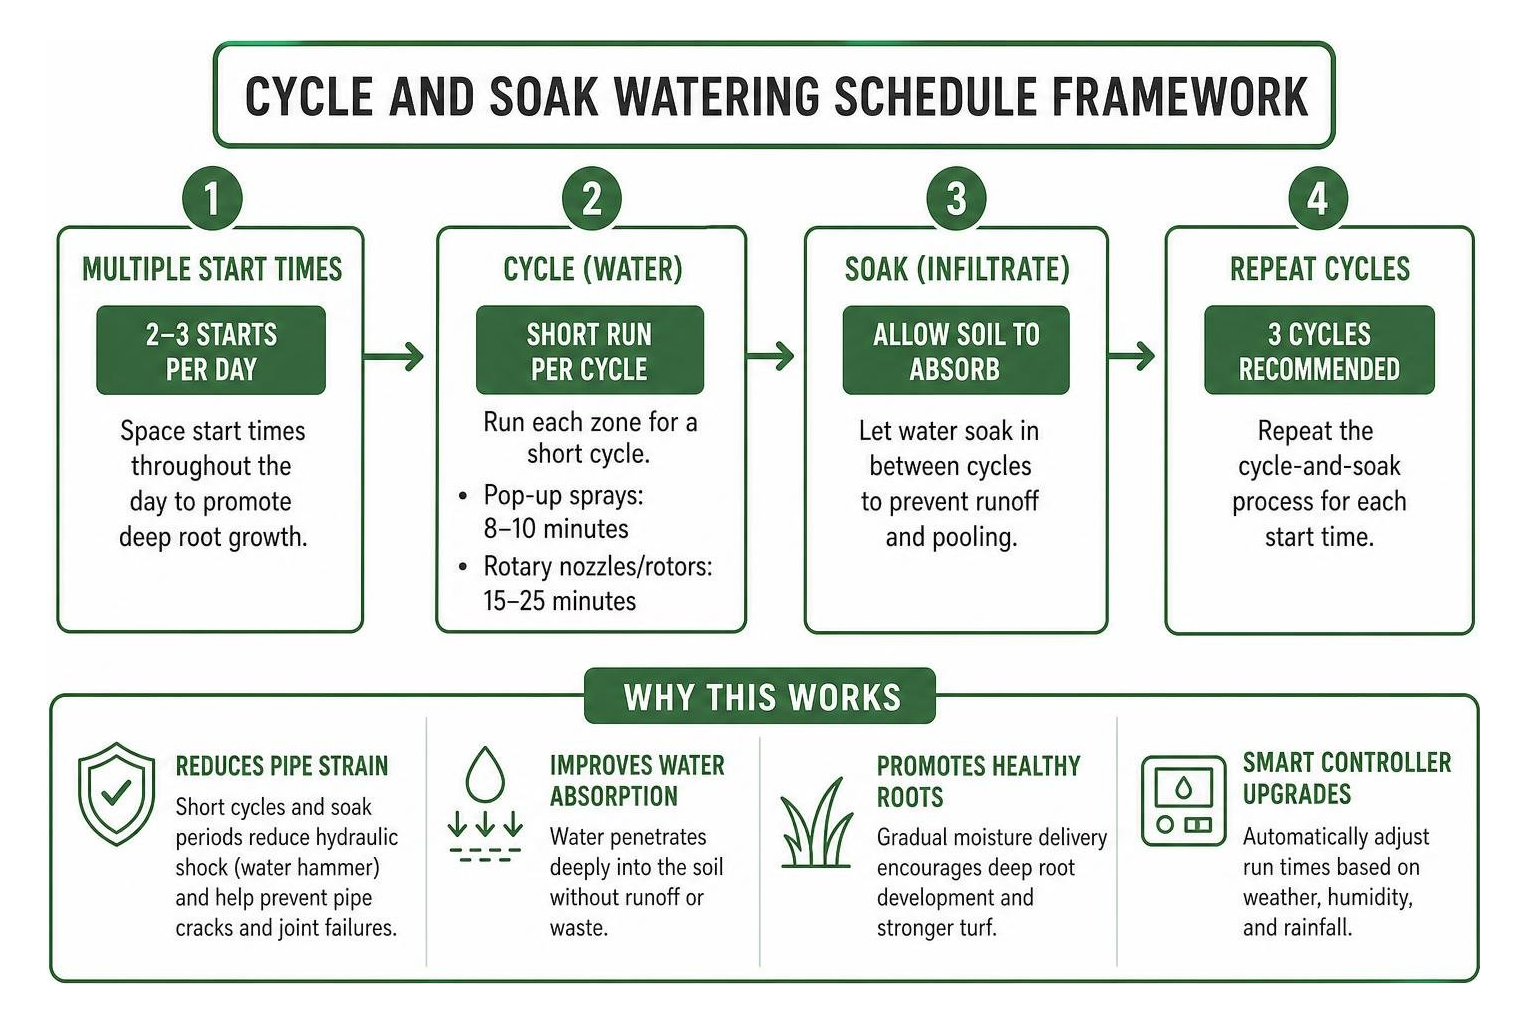
Many pipe cracks and joint failures stem from hydraulic shock—known as water hammer—and improper system run times. Adjusting your controller schedule reduces physical strain on underground lines while keeping turf roots healthy.
- The Cycle-and-Soak Method: Rather than running a station for 30 consecutive minutes, split the run time into three 10-minute cycles spaced an hour apart. This allows water to sink deeply into heavy soils without pooling or creating runoff.
- Short-Cycle Run Times: Program pop-up spray heads for no more than 8 to 10 minutes per start time. For larger rotary nozzles and rotors, keep cycles between 15 and 25 minutes.
- Multiple Start Times: Using 2 to 3 start times per watering day encourages deep root development by allowing moisture to reach the root zone gradually.
- Smart Controller Upgrades: Modern smart controllers adjust run times automatically based on real-time weather, humidity, and rainfall data, cutting landscape water waste by up to 30% to 50%.
To explore modern water-saving upgrades, review our overview of smart irrigation services.
Soil Impact on Sprinkler System Repair Frequency
Local soil composition plays a major role in how often underground pipes shift, crack, or pull apart at glued joints.
- Expanding Clay Soils: Expansive clay soil expands dramatically when wet and contracts into hard, cracked ground when dry. This seasonal soil movement exerts lateral shear forces on buried PVC pipes, snapping rigid glue joints and cracking valve manifolds.
- Root Intrusion: Trees and large shrubs seek out moisture around damp fittings. Over time, expanding tree roots wrap around buried lines, crushing thin-walled pipes or shearing lateral lines.
- Hydraulic Stress and Pressure Surges: When zone valves snap shut quickly against high water pressure, shockwaves rattle through pipes. Installing pressure-reducing valves (PRVs) protects joints from premature fatigue.
If your property has expanded with new garden beds or lawn areas, adding an irrigation zone helps maintain balanced water volume and pressure across your entire yard.
Frequently Asked Questions About Sprinkler Maintenance
How do I locate an underground pipe leak quickly?
Look for areas of turf that remain unusually soggy or spongy when the rest of the lawn is dry. If you notice a specific zone experiencing low water pressure or sputtering spray heads, activate that zone manually and walk the line between the valve box and the first malfunctioning head. If water flows continuously while the system is idle, check your main water meter; a spinning dial confirms a leak on the pressurized mainline. If you need assistance troubleshooting complex leaks, you can learn more about local drip and irrigation repair options.
Can you repair a cracked pipe without replacing the whole system?
Yes. The vast majority of underground leaks are isolated to a single fitting, a root-damaged segment, or a split glue joint. Technicians cut out the damaged section and splice in new Schedule 40 PVC or poly pipe using telescopic slip repair couplings. Full system replacement is only necessary when piping has severely degraded from age, was installed with improper pipe sizing throughout, or has suffered widespread root damage across every zone. You can also research contractor standards on platforms like Yelp when selecting a service provider.
How often should sprinkler heads and valves be serviced?
Sprinkler systems should receive a comprehensive tune-up at least twice a year—once during spring startup and again before winter. Regular servicing includes:
- Cleaning internal debris screens inside pop-up nozzles
- Checking and realigning spray patterns away from hardscapes
- Inspecting valve boxes for standing water or leaking bonnet seals
- Testing backflow assemblies to ensure clean drinking water protection
- Testing the rain sensor to confirm it halts scheduled watering cycles during rain
Professional Irrigation Care Across Southern California
Maintaining an efficient, reliable sprinkler system protects your turf, preserves your plant investments, and prevents costly water waste. Since 1991, Southern California Tree & Landscape has delivered dependable irrigation and landscape solutions for properties throughout Torrance, Covina, Harbor City, and the wider South Bay.
Whether you are facing a cracked mainline, malfunctioning zone valves, or an unresponsive controller, our experienced crews and ISA-certified arborists provide prompt, professional service. Explore our comprehensive irrigation and sprinkler repair services to schedule a diagnostic inspection or repair today.