
Repair a Buried Plastic Sprinkler Pipe Before It Wastes More Water
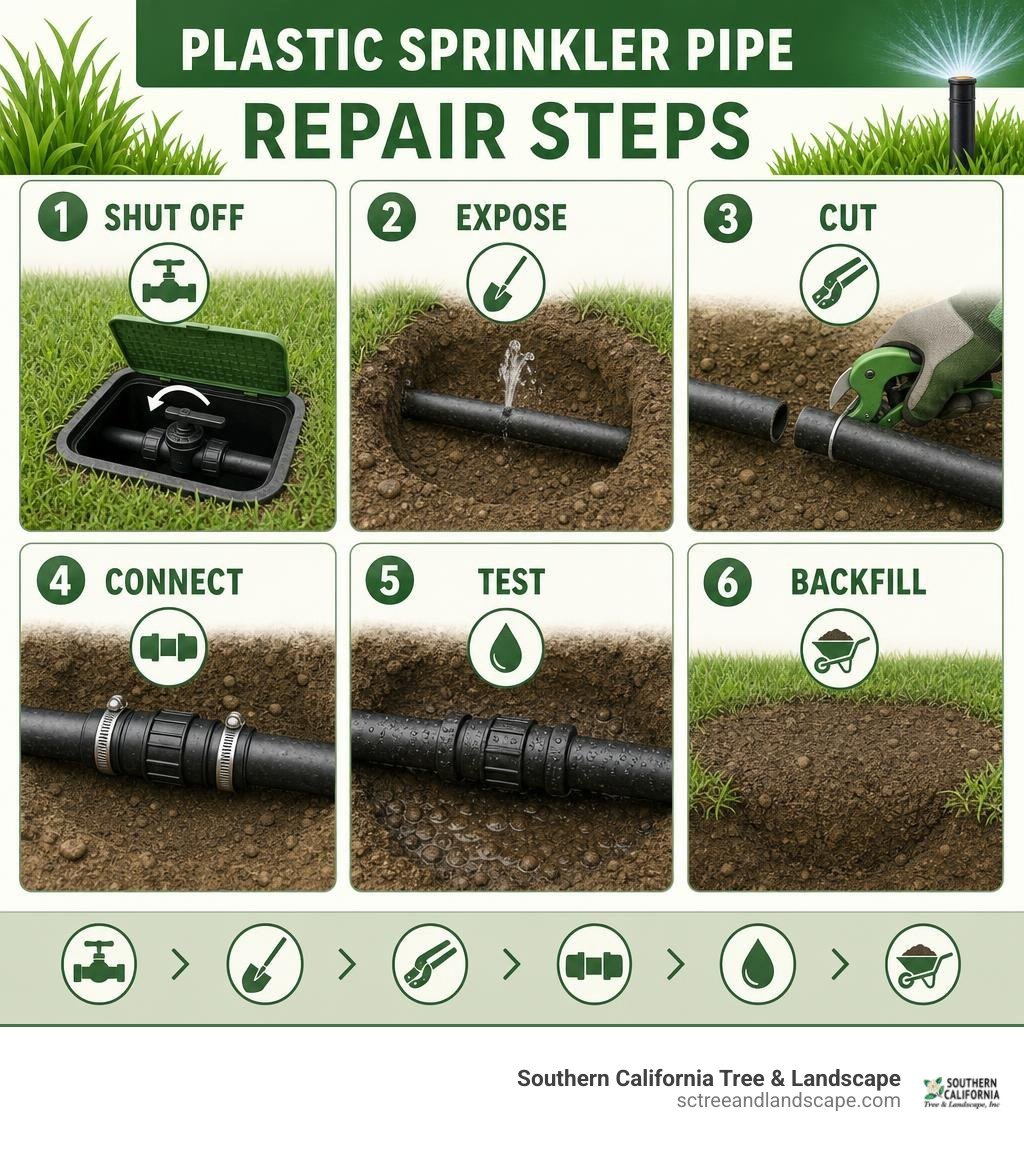
To repair a buried plastic sprinkler pipe, shut off the irrigation water, dig carefully around the leak, cut out the damaged section, and install the right fitting for the pipe material. Use a solvent-weld slip or telescoping coupling for rigid white PVC. Use a barbed insert coupling with corrosion-resistant stainless steel clamps for flexible black polyethylene (PE) pipe.
A small underground leak can quickly turn into soft turf, poor sprinkler pressure, and wasted water. The key is to expose enough pipe to work without bending it, make clean square cuts, test the repair under pressure, and backfill with rock-free soil or sand.
Tree roots, shifting soil, and accidental shovel strikes are common causes. If roots have lifted or displaced the line, rerouting the repaired section away from the root zone is often smarter than making the same repair twice.
I am Troy Basmajian, President of Southern California Tree & Landscape, and I have worked with teams serving Southern California properties through irrigation maintenance, landscape improvements, and long-term site care. In this guide, I will explain how to repair plastic sprinkler pipe with practical methods that help prevent repeat leaks and unnecessary lawn damage.
Identifying Your Pipe Material and Essential Repair Tools
Before cutting into your irrigation system, you must identify the exact plastic material running beneath your turf. Underground residential sprinkler systems rely almost entirely on two distinct plastics: rigid Polyvinyl Chloride (PVC) and flexible High-Density Polyethylene (PE). Because their chemical structures are completely different, using the wrong repair fitting or adhesive guarantees a high-pressure blowout.
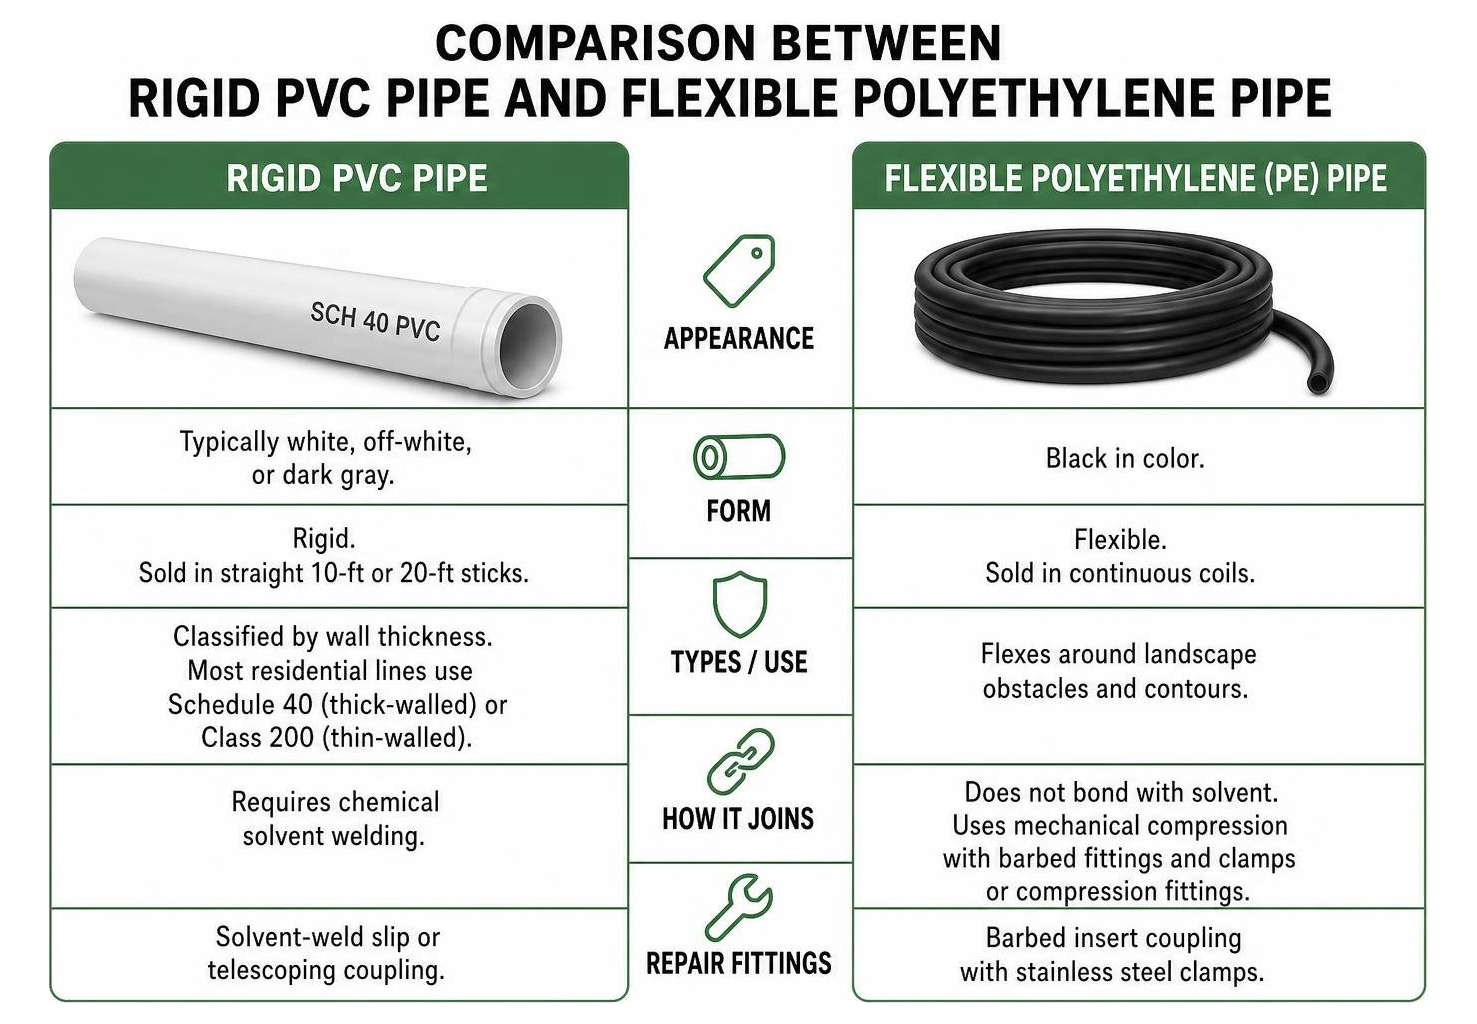
- Rigid PVC Pipe: Typically white, off-white, or dark gray. It is rigid, sold in straight 10-foot or 20-foot sticks, and classified by wall thickness. Most residential sprinkler lines utilize Schedule 40 (thick-walled, rated for higher static pressure) or Class 200 (thin-walled, often used on downstream lateral lines). PVC requires chemical solvent welding to join sections.
- Flexible Polyethylene (PE) Pipe: Sold in continuous coils and black in color. It flexes around landscape obstacles and contours. Polyethylene is a non-polar polymer, meaning solvent glues cannot dissolve or bond to its surface. PE lines rely strictly on mechanical compression, such as barbed insert fittings secured with clamps or compression packings.
To execute a lasting repair, gather the right trade tools before excavating your lawn:
- Ratcheting PVC Pipe Cutters: Make clean, square cuts without leaving jagged edges or plastic shavings inside the line.
- Deburring Tool or 80-Grit Sandpaper: Smooths internal and external cut edges to ensure proper fitting insertion.
- Socket Saver (Fitting Reamer): Bores out severed pipe stubs directly from fitting hubs when breaks happen flush against tees or elbows.
- Purple Primer & PVC Solvent Cement: Form the chemical weld needed for rigid PVC piping.
- Barbed Insert Fittings & Couplings: Heavy-duty plastic, brass, or stainless steel couplers designed for flexible poly tubing.
- 300-Series Marine-Grade Stainless Clamps or Oetiker Ear Clamps: Prevent underground rust and distribute uniform radial pressure over insert barbs.
| Feature | Rigid PVC (Polyvinyl Chloride) | Flexible PE (Polyethylene) |
|---|---|---|
| Color & Form | White/Gray straight rigid sticks | Black continuous flexible coils |
| Common Classes | Schedule 40, Schedule 80, Class 200 | SDR-9, SDR-11, 100–200 PSI |
| Joining Method | Chemical Solvent Weld (Primer + Cement) | Mechanical Barbs, Clamps, Compression |
| Glue Compatible? | Yes (Specific PVC Cement) | No (Solvent cement will not bond) |
| Typical Application | Mainlines, lateral runs, manifolds | Lateral lines, cold climates, rocky soils |
For homeowners wanting an overview of standard maintenance routines, check our guide on quick and easy DIY sprinkler repair methods to inspect common zone components before starting excavation.
Step-by-Step Guide: How to Repair Plastic Sprinkler Pipe (PVC Lines)
When repairing rigid PVC lines, following a strict chemical welding protocol prevents future joint failure. Clean cuts, thorough deburring, and adequate cure times ensure the connection handles 40 to 70 PSI operating pressures without leaking.
- Isolate and Excavate: Turn off the main water supply to the irrigation system. Dig out the damaged area to create a clear “bell hole”—clearing at least 6 inches beneath the broken pipe and 12 inches on either side. This keeps mud, standing water, and loose soil from contaminating the repair.
- Cut Out the Damage: Use a ratcheting pipe cutter to remove the fractured section. Make perpendicular, 90-degree cuts. Avoid hacksaws whenever possible, as they produce rough burs that create leak pathways inside fitting sockets.
- Deburr and Bevel: Run a deburring tool or 80-grit sandpaper along the inner and outer cut edges. Removing interior burrs prevents nozzle clogs downstream, while beveling the outer edge stops the pipe from scraping glue off the fitting wall during insertion.
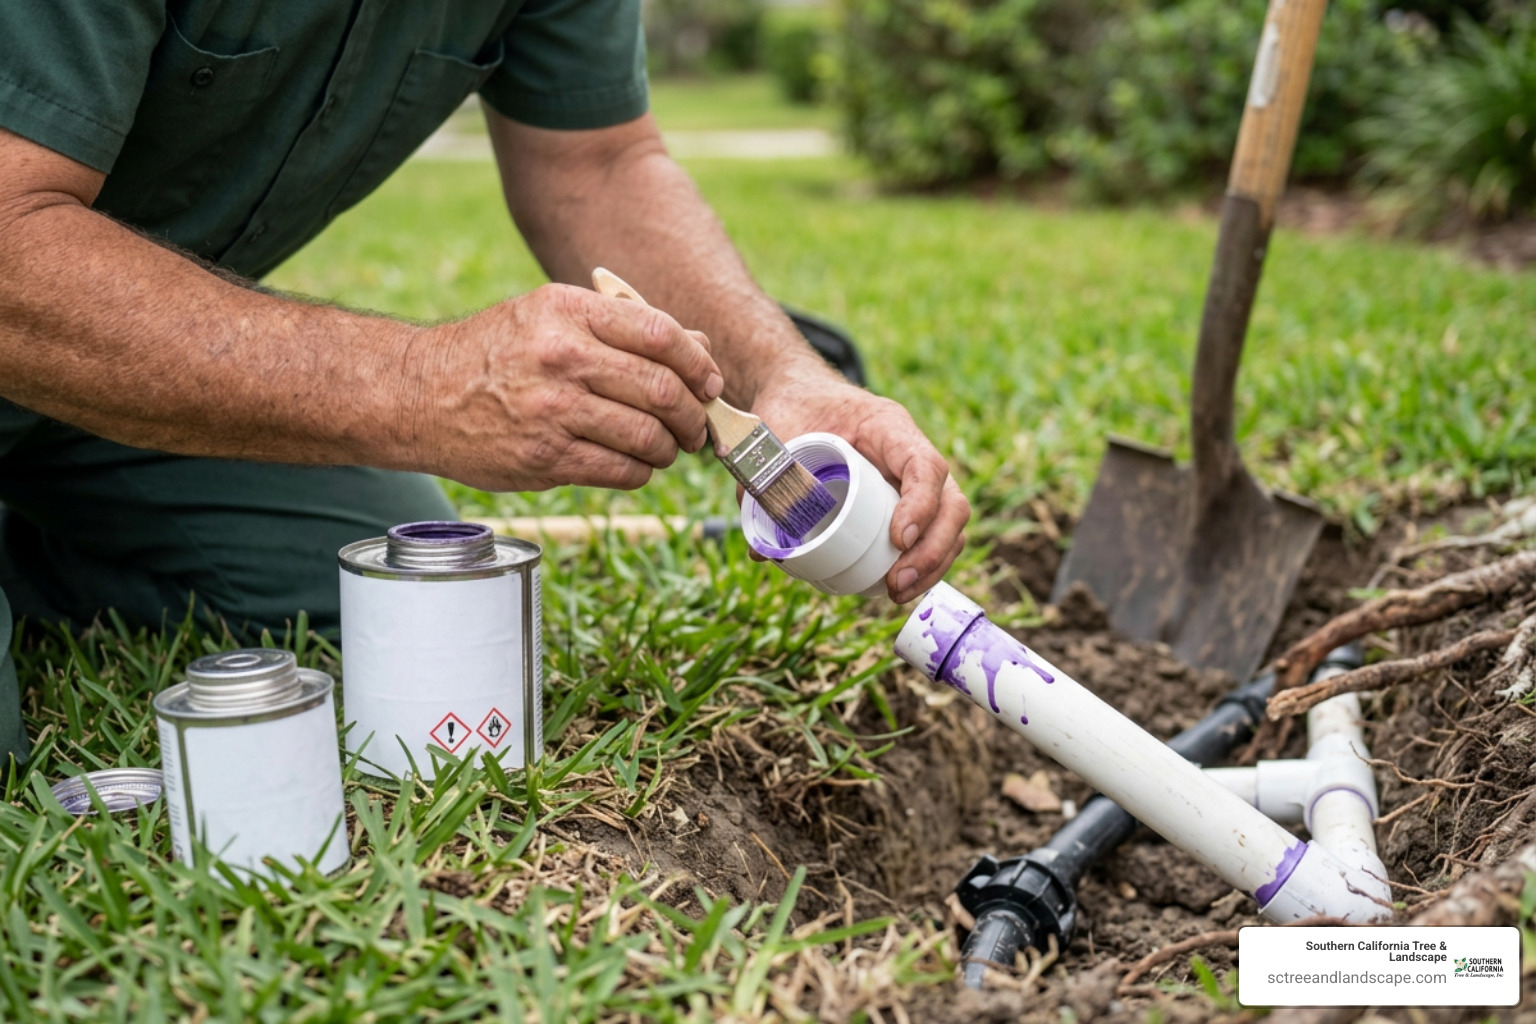
- Apply Purple Primer: Liberally brush purple primer around the exterior of the pipe end and inside the fitting socket. The primer removes surface glaze and chemically softens the PVC plastic matrix.
- Apply Solvent Cement and Join: While the primer is still wet, apply an even layer of medium-bodied PVC solvent cement over the primed areas. Immediately push the pipe into the fitting socket until it hits the internal stop, giving it a 1/4-turn twist to distribute the cement evenly.
- Hold to Prevent Push-Out: Hold the joint firmly together for 30 seconds. Because PVC fitting sockets are slightly tapered, wet solvent cement will push the pipe back out if released immediately.
For supplemental advice on diagnosing lateral runs and localized line breaks, review these step-by-step plastic irrigation pipe repair instructions, or explore our techniques for easy drip and lateral line leak fixes.
How to Repair Plastic Sprinkler Pipe with Telescoping Couplings
Standard slip couplings require you to bend rigid PVC upward to slide the fitting into place. On deeply buried lines or short pipe spans, bending PVC can crack adjoining joints down the line. A telescoping repair coupling (commonly referred to as a Slip-Fix) eliminates pipe flexing entirely.
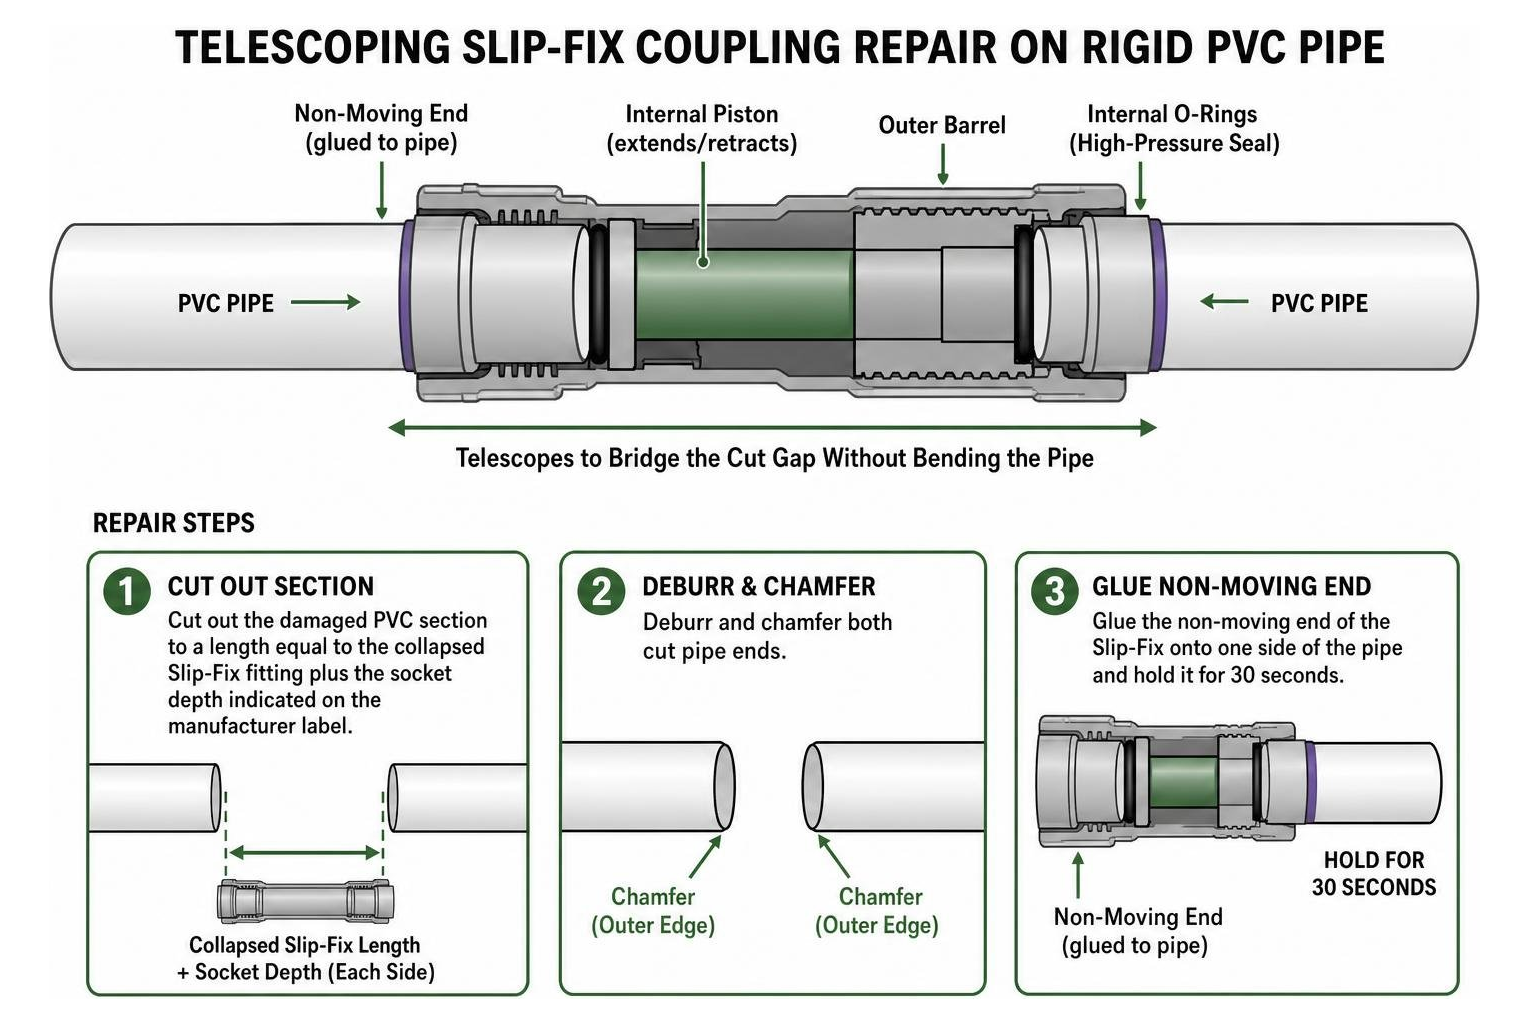
A telescoping coupling features an internal piston that extends and contracts within an outer barrel sealed with high-pressure internal O-rings.
- Cut out the damaged PVC section to a length equal to the collapsed Slip-Fix fitting plus the socket depth indicated on the manufacturer label.
- Deburr and chamfer both cut pipe ends.
- Glue the non-moving end of the Slip-Fix onto one side of the pipe and hold it for 30 seconds.
- Apply primer and solvent cement to the exposed piston end and the remaining open pipe socket.
- Fully extend the telescoping piston straight forward into the second glued socket until seated. Hold firmly to prevent the piston from creeping backward before the cement sets.
Repairing PVC Pipes Broken Flush at Fittings Without Demolition
A common headache occurs when a sprinkler riser or pipe snaps off completely flush inside an underground elbow, tee, or manifold socket. Traditionally, this required digging out and rebuilding the entire manifold. You can resolve this cleanly using a Socket Saver drill attachment.
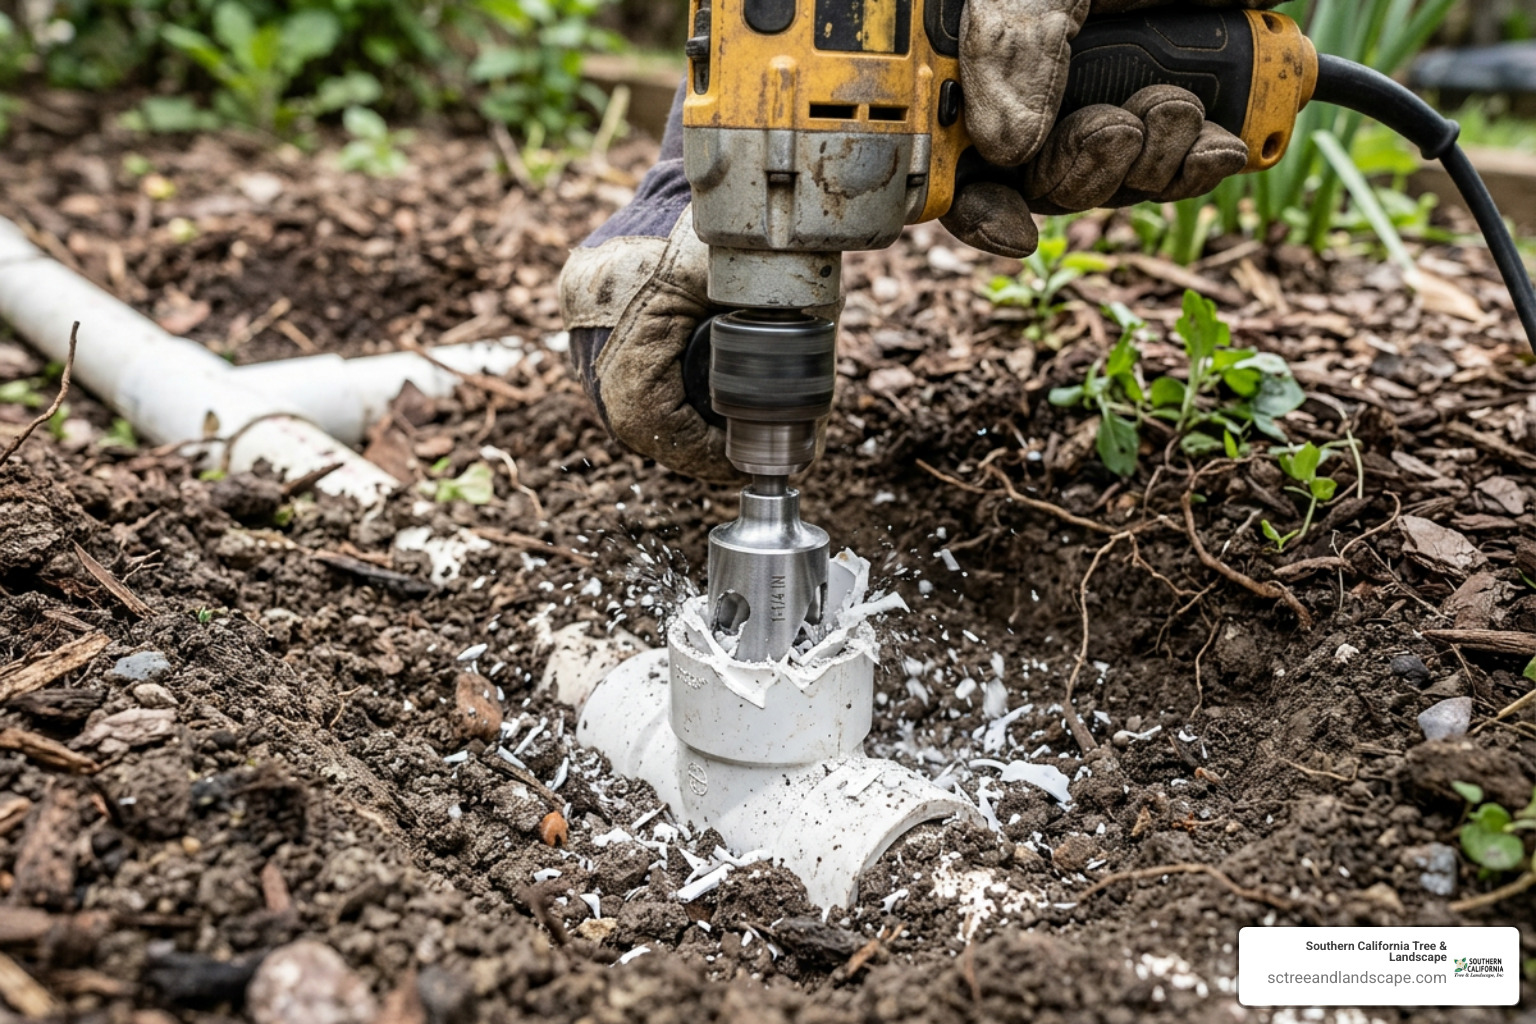
- Cut the jagged, broken stub completely flat and flush with the face of the fitting using an oscillating multi-tool or flush-cut handsaw.
- Chuck a Schedule 40 socket saver bit (matching your pipe’s internal diameter, typically 3/4-inch or 1-inch) into a standard variable-speed cordless drill.
- Insert the guide wheel of the tool into the broken pipe stub.
- Run the drill at a steady, medium RPM. The cutting blade will shave away the glued pipe fragment without cutting into the fitting’s outer wall.
- Clear plastic shavings periodically and sand the inside of the restored hub with 120-grit sandpaper.
If you do not have a socket saver on hand, carefully heating the inner fragment with a heat gun makes the interior stub pliable like soft leather, allowing you to pry it away from the hub wall using a flathead screwdriver. For a deeper breakdown of this technique, read our guide on extracting broken PVC pipe flush at fittings.
Fixing Flexible Black Polyethylene (PE) Sprinkler Lines
Black flexible polyethylene pipe behaves differently from PVC. PE is manufactured from non-polar resins that naturally resist chemical bonding agents. Applying PVC primer or solvent glue to poly pipe will soften the material temporarily before sliding right off under water pressure. Polyethylene repairs rely on mechanical connections using barbed insert couplings and stainless steel clamping rings.
When planning repairs or upgrades across your property, evaluating overall sprinkler system installation factors helps determine when localized mechanical patching is practical versus replacing aged, degraded lateral zones.
How to Repair Plastic Sprinkler Pipe Made of Polyethylene
To repair severed or punctured black flexible poly line, use the Double-Clamp Method with marine-grade fasteners:
- Square Cut: Cut out the damaged section with ratcheting pipe cutters. Ensure the cut is clean and perpendicular so the pipe end seats firmly against the center stop of the insert fitting.
- Slide Clamps First: Slide two 300-series stainless steel worm-gear clamps (or Oetiker ear clamps) over each side of the cut pipe before inserting any fittings.
- Warm Cold Pipe Ends: Poly pipe becomes stiff in cooler weather, making barbed fittings hard to insert. Warm the pipe ends for 10–15 seconds using a heat gun or hot water to achieve a surface temperature of roughly 200°F. This expands the plastic slightly without scorching or melting the wall.
- Seat the Insert Fitting: Push a high-impact plastic or brass barbed coupling fully into both pipe ends until the pipe edges butt flush against the center shoulder stop.
- Secure Clamps (180-Degree Offset): Position the first clamp 1/8 to 1/4 inch from the cut edge directly over the barbs. Position the second clamp 1/4 inch behind the first. Offset the screw housings by 180 degrees from each other to distribute 360-degree radial tension evenly across the fitting.
- Torque Tighten: Tighten worm-gear clamps with a 5/16-inch nut driver to roughly 15 to 20 inch-pounds. Avoid flathead screwdrivers, which slip and strip the clamp band.
Advanced Compression Fittings and Permanent Fusion for Poly Lines
On high-pressure mainlines or deep commercial installations where clamp failure is not an option, mechanical compression couplings and thermal socket fusion provide maximum reliability.
- Pack-Joint Compression Couplings: Heavy-duty brass or polypropylene compression fittings utilize internal rubber gaskets and split-ring grippers. When tightening the compression nut down over thin-walled poly pipe (such as SDR-15 or thinner), insert a stainless steel internal pipe stiffener into the pipe end. This prevents the poly wall from collapsing inward under compression.
- Socket and Electrofusion Sleeves: For municipal-grade High-Density Polyethylene (HDPE), heating irons melt the pipe surface and fitting sleeve at 400°F–500°F, creating a unified chemical-free joint that eliminates mechanical failure points entirely.
System Pressure Testing, Bedding, and Preventing Future Pipe Damage
Never backfill a repaired irrigation trench until the line has undergone static and dynamic pressure tests.
- Pressurize Slowly: Open the main water valve slowly. Rapidly filling an empty pipe creates water hammer shockwaves that can blow fresh joints apart.
- Inspect for Micro-Weeping: Let the zone run under full operating pressure for at least 5 to 10 minutes. Dab a dry paper towel around the joints; any moisture indicates clamp slippage or incomplete solvent fusion.
- Bed with Sand: Prevent point-loading punctures by bedding the pipe in 6 inches of clean plaster sand or finely sifted, rock-free soil. Settling rocks pressing against buried plastic pipes are a leading cause of long-term puncture leaks.
- Tamp and Reroute Near Tree Roots: If invasive tree roots cracked the pipe, reroute the line outside the tree’s expanding root flare rather than putting the pipe back in harm’s way.
If you encounter complex manifold breaks, low pressure across multiple stations, or root-damaged mainlines, consider connecting with certified irrigation repair specialists to inspect your system.
Frequently Asked Questions About Sprinkler Pipe Repair
Can I use epoxy putty or waterproof tape for a permanent fix on a plastic sprinkler pipe?
No. Epoxy putties and silicone repair tapes are temporary emergency patches. Residential irrigation pipes operate under constant static and dynamic pressures between 40 and 70 PSI. Soil moisture, ground settling, and regular pressure cycling will push tape and topical putty off smooth plastic pipe within weeks. A permanent repair requires cutting out the damaged area and installing solvent-welded PVC couplings or clamped barbed mechanical fittings.
What is the most common reason buried plastic sprinkler pipe repairs fail?
The two leading causes of repair failure are using cheap galvanized hose clamps on poly lines and omitting purple primer on PVC solvent welds. Galvanized clamps corrode underground within 12 to 24 months, causing the pipe to back off the fitting barbs. On PVC, skipping primer creates a weak “cold glue joint” that pops apart when water valves slam shut. Always use 300-series marine-grade stainless steel hardware and apply primer to both pipe and fitting hubs.
Can PVC primer and solvent cement be used on black poly pipe?
No. PVC cement works through a chemical solvent process that dissolves and re-hardens the surface polymers of rigid PVC. Polyethylene (PE) is a non-polar, chemically inert plastic that will not dissolve when exposed to PVC cement. Glues applied to black poly pipe create a loose, brittle coating that fails immediately once pressurized. Poly pipe must always be joined with mechanical barbed couplings, compression fittings, or thermal fusion.
Reliable Irrigation Maintenance for Southern California Landscapes
Properly fixing broken sprinkler lines keeps your landscape green while protecting your water bill. By matching the right repair technique to your pipe material, deburring cut ends, using marine-grade hardware, and bedding trenches in clean soil, your repairs will hold up for seasons to come.
Southern California Tree & Landscape has served communities across Torrance, the South Bay, Covina, and Harbor City since 1991. If you need assistance with extensive irrigation line breaks, root intrusion damage, or system upgrades, explore our professional irrigation and landscape drainage services to keep your property running efficiently.