
When Your Lawn Sprinkler Breaks: What to Do First
Need to fix a lawn sprinkler fast? Here’s a quick overview of the most common problems and their fixes:
- Broken or clogged sprinkler head — Clean debris from the filter screen or replace the head ($3–$25 per head)
- Head won’t pop up — Press the riser down 4–5 times while the zone runs to flush debris; replace if cracked
- Leaking at the base — Check Teflon tape seal; replace head if housing is cracked
- Zone won’t turn on or shut off — Inspect the valve and solenoid; replace solenoid ($15–$30) if zone stays on
- Soggy or dry patches — Could be a misaligned head, underground pipe leak, or pressure issue
A single broken sprinkler head can waste hundreds of gallons of water per hour. Misaligned heads spraying onto driveways or sidewalks can burn through up to 5,760 gallons per zone per month — a serious problem for Southern California property owners managing water costs and drought restrictions.
The good news? Most sprinkler problems are fixable without a professional. A cracked head, a stuck riser, a worn diaphragm — these are all repairs most homeowners can handle in under an hour with basic tools.
This guide walks you through how to diagnose the problem, make the repair, and prevent it from happening again.
I’m Troy Basmajian, President of Southern California Tree & Landscape, and over the past decade I’ve overseen irrigation repair and maintenance for hundreds of residential and commercial properties across Southern California — giving me a front-row seat to nearly every way a sprinkler system can fail. Whether you’re looking to fix a lawn sprinkler head yourself or decide when to call in a pro, this guide gives you the same practical knowledge my team uses every day.
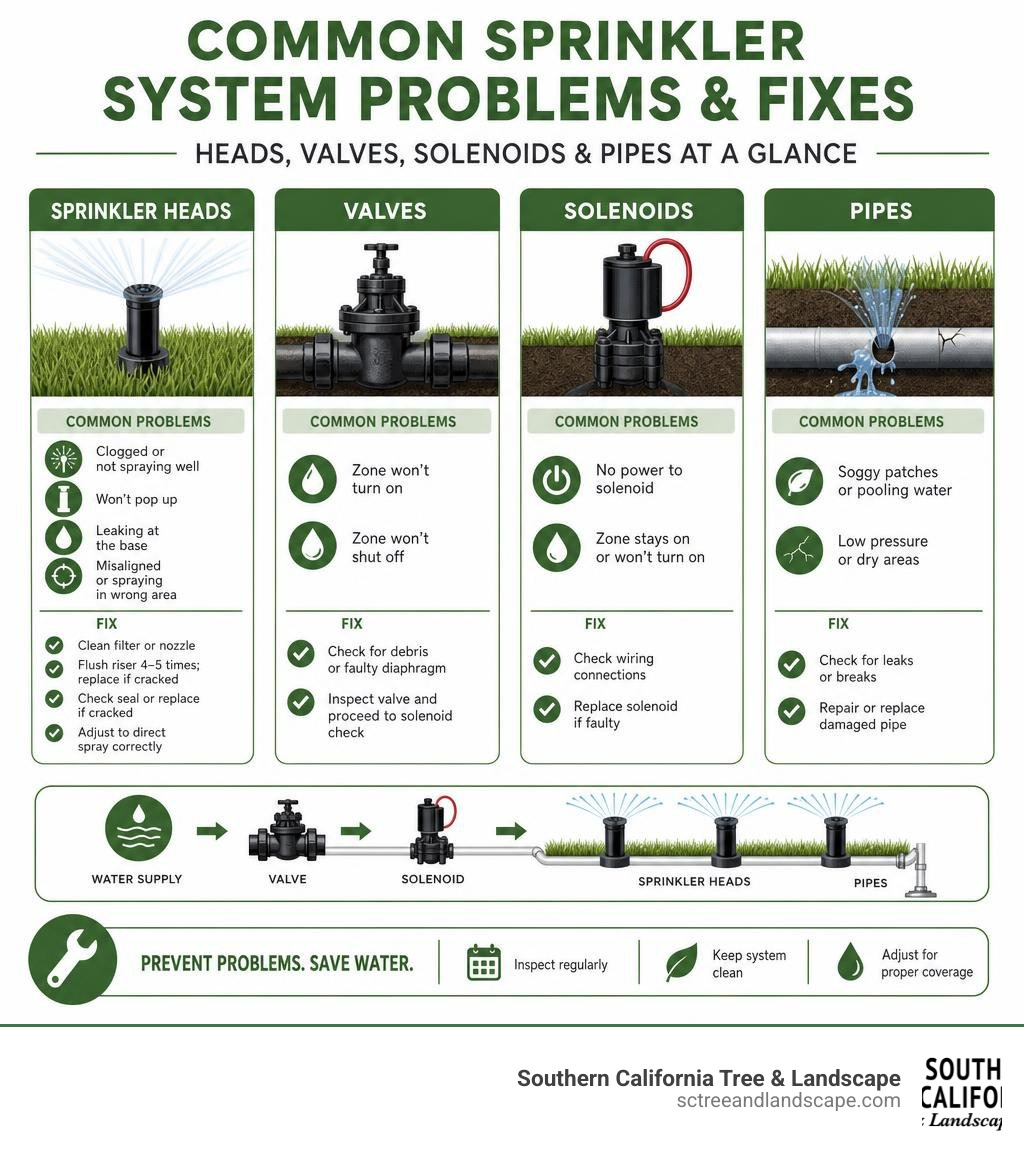
Fix lawn sprinkler terms to remember:
Troubleshooting Your Irrigation System: Head, Valve, Solenoid, or Pipe?
Before you grab a shovel and start digging up your entire yard, you need to pinpoint exactly where the system is failing. Sprinkler systems are highly pressurized networks. A failure in one spot can mimic a problem somewhere else. For example, a dry, brown patch of grass doesn’t always mean a broken pipe; it might simply be a misaligned head or a clogged filter.
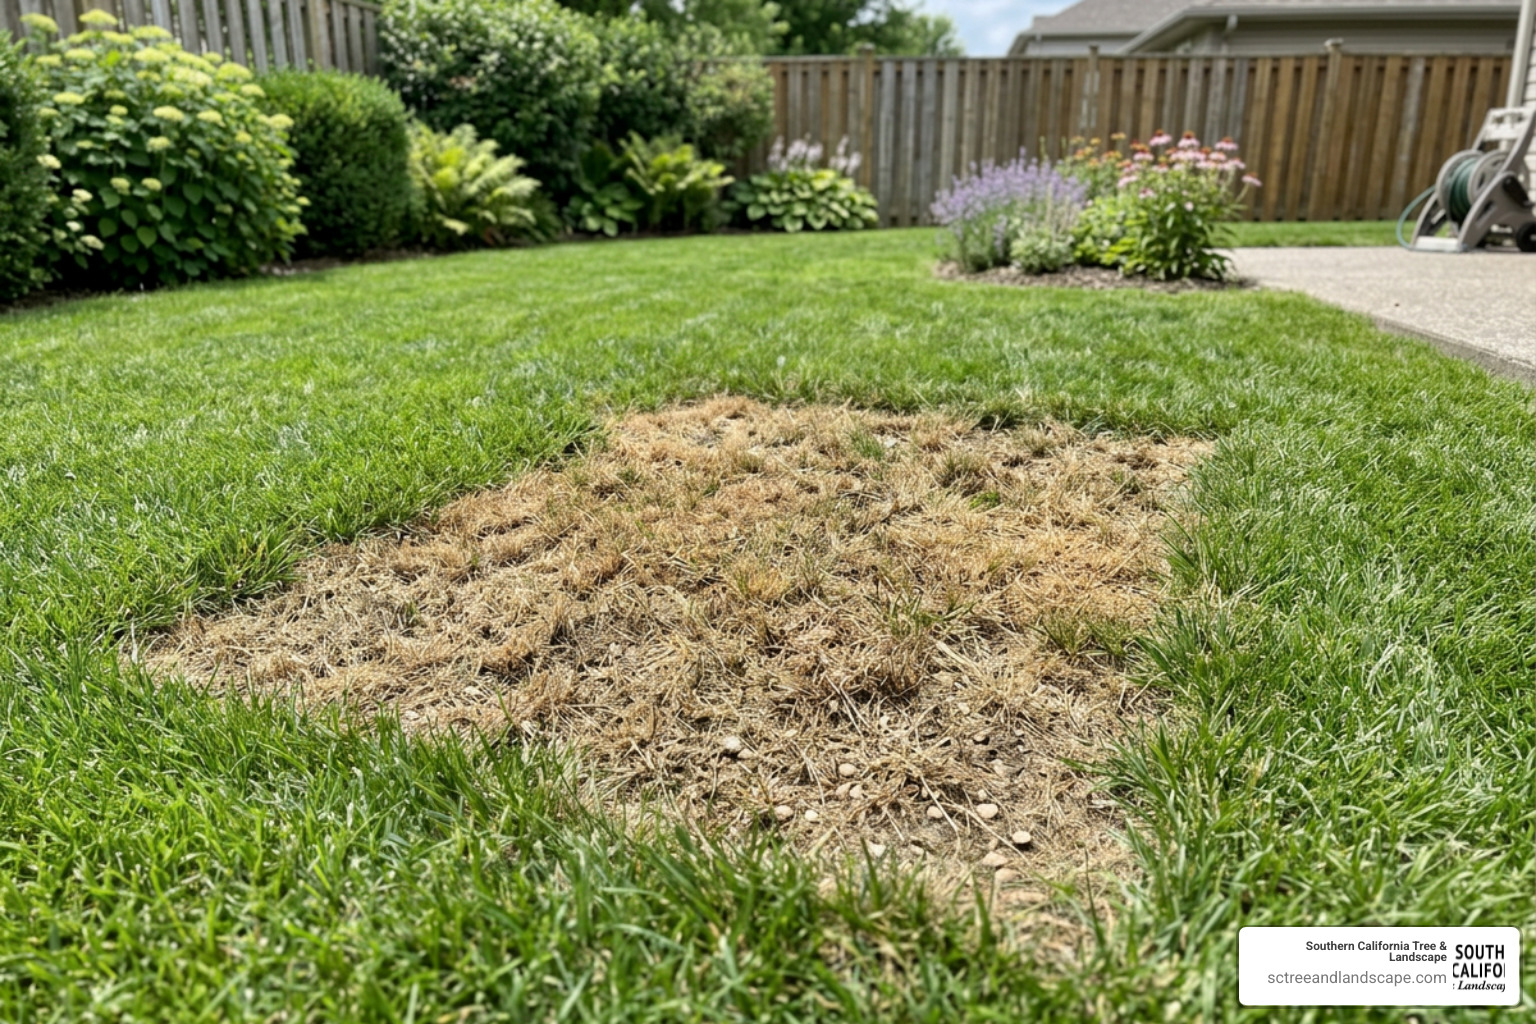
To diagnose the system, turn on the troublesome zone and watch it run for a full minute. Pay close attention to water pressure, spray patterns, and where water is pooling. Use this symptom-and-cause breakdown to narrow down your target:
| What You See | What It Actually Means | Most Likely Culprit |
|---|---|---|
| Water geyser shooting straight up | A broken connection right below the head | Broken riser or cracked head housing |
| One head barely mists or won’t pop up | Low pressure at that specific node or jammed spring | Clogged filter screen or debris in the wiper seal |
| Entire zone has very weak water pressure | Insufficient flow entering the lateral line | Partially closed zone valve or a major underground pipe leak |
| Sprinklers keep running after the controller shuts off | Water is slipping past the physical barrier in the valve | Faulty valve diaphragm or a failed electrical solenoid |
| Soggy, muddy ground when the system is off | Constant slow leak from a pressurized line | Cracked lateral pipe or a valve that won’t seal completely |
| Mushrooms or unusually lush green patches | Water pooling underground and rising to the surface | Slow underground pipe leak or tree root damage |
If you notice a single head weeping water around the base of its cap while running, the internal wiper seal is likely shot. If the entire zone fails to turn on, you are dealing with an electrical or valve issue. Taking thirty seconds to observe these behaviors before touching any tools will save you hours of unnecessary work.
How to Safely Prep and Fix Lawn Sprinkler Heads
Safety always comes first. Before you attempt to fix a lawn sprinkler head, you must isolate the water supply and electrical power.
Locate your main irrigation shutoff valve. In Southern California communities like Torrance, Harbor City, and Covina, this is typically located near your water meter or next to your home’s main backflow preventer assembly. Turn the valve to the off position. If you are working on any electrical components—such as replacing a valve or a solenoid—head over to your sprinkler controller box and unplug it or switch off the dedicated breaker.
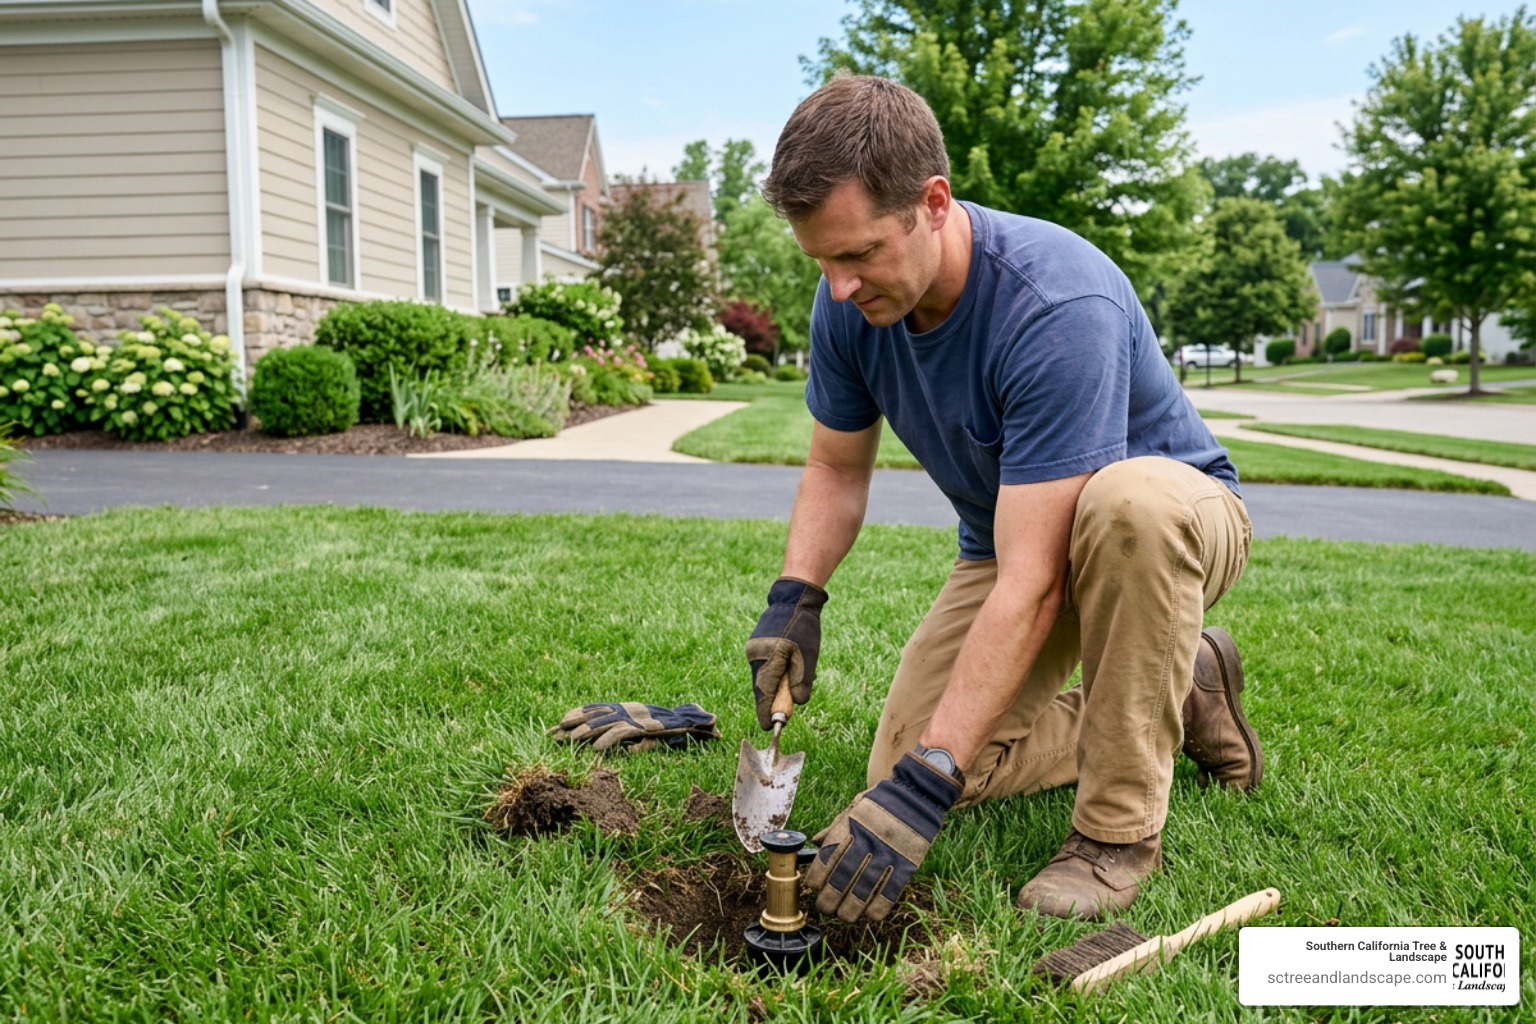
Once the water is off, gather the essential tools you will need for a head replacement:
- A small hand trowel or garden shovel
- A riser extractor tool (an absolute lifesaver if the plastic threads break off inside the underground fitting)
- Teflon tape (plumber’s tape)
- A replacement sprinkler head (always match the brand, model, and nozzle type of your existing system to maintain even water distribution)
- A clean rag
When you are ready to dig, clear a 6-to-12-inch circle around the damaged head. Dig straight down carefully to avoid striking the lateral PVC pipe. Once you expose the connection where the head threads onto the riser, unscrew the broken head by turning it counterclockwise.
Before screwing on the new head, it is critical to flush the line. Dirt and small pebbles easily fall into the open pipe while you dig. If you don’t flush them out, they will instantly clog your brand-new head. To do this, have someone turn the water back on for just 5 seconds while the head is off. This pushes a clean stream of water through the line, clearing out any trapped debris.
For a detailed walkthrough on diagnosing stuck heads, check out this guide on How to Fix a Sprinkler Head That Won’t Pop Up (Step-by-Step), HomeFixer101.
Step-by-Step Guide to Fix Lawn Sprinkler Heads That Won’t Pop Up
If your sprinkler head refuses to pop up, it is usually because dirt, sand, or lawn clippings have wedged into the tiny gap between the pop-up riser and the main cap. Over time, mineral deposits from our Southern California water can also build up, causing the internal spring mechanism to stick.
You don’t always have to dig up the head to fix this. Try this simple, no-tool debris flush first:
- Turn on the zone.
- While the water is running, gently step on the stubborn riser, pushing it all the way down into its housing, then release it.
- Repeat this foot-press method 4 to 5 times.
This manual pumping action forces water to rush through the wiper seal gap, flushing out trapped sand and debris in under a minute. If the head pops up and seals properly after this, you’re good to go!
If the head still won’t pop up, or if water continuously weeps from the cap while running, the wiper seal is worn out. At this point, you can either replace the entire head or perform a quick internal swap. Because sprinkler heads are highly standardized, you can often unscrew the top cap of the broken head, pull out the internal spring and riser assembly, and slide in the matching internals from a brand-new, identical head. This saves you from digging and preserves the original underground connection.
If you do need to replace the entire unit, follow the steps in How to Repair a Broken Sprinkler Head: Quick & Easy Fixes – to ensure you select the right height and nozzle size for your turf.
How to Adjust Spray Direction, Arc, and Distance
Once your new head is installed, you must adjust it to prevent wasting water on your driveway, patio, or home’s siding. Different types of heads require different adjustment methods:
- Fixed Spray Heads: These heads deliver a constant fan of water. To adjust the direction, grab the pop-up riser (gently, using your fingers or a cloth-wrapped wrench to avoid scratching the plastic) and click-rotate it until the spray aligns with your lawn edge. To adjust the spray distance, locate the small slot screw in the center of the nozzle. Turn it clockwise with a flathead screwdriver to reduce the radius, or counterclockwise to increase it.
- Rotor Heads (Gear-Driven): Rotors rotate back and forth across a set arc. To adjust a rotor (like a Rain Bird 5000 or Hunter PGP), you will need a specialized rotor key or a small flathead screwdriver. Insert the tool into the arc adjustment socket on top of the head. Turn clockwise to increase the arc (up to 360 degrees) or counterclockwise to decrease it. Adjust the distance by turning the radius reduction screw, which diffuses the stream. Always make these adjustments while the zone is running so you can see the real-time spray pattern.
- Impact Sprinklers: These classic brass or plastic heads use a swinging arm to distribute water. Adjust the arc by sliding the two metal friction rings at the base of the head closer together or further apart. To adjust the distance, turn the diffuser pin to disrupt the stream, or adjust the deflector flap on top of the nozzle.
Repairing Faulty Sprinkler Valves and Solenoids
Your sprinkler valves are the gatekeepers of your irrigation system. They receive electrical signals from your controller and physically open or close to let water flow to specific zones. When a valve fails, you’ll usually notice that an entire zone won’t turn on, or conversely, a zone refuses to shut off even when the controller is powered down.
Most residential valves are housed in a buried plastic valve box with a green lid. Open this box and inspect the area. If you see standing water inside, you have a leaking valve.
The two most common valve repairs are replacing the solenoid or replacing the internal diaphragm:
- Replacing a Faulty Solenoid: The solenoid is the cylindrical plastic piece with two wires extending from it, threaded into the top of the valve. It acts as an electromagnet. If a single zone won’t turn on, but you can turn it on manually by twisting the solenoid a quarter-turn counterclockwise, the solenoid’s electrical coil has failed. To replace it, turn off the controller power, disconnect the two wires, unscrew the old solenoid, and screw in a new one. Always use waterproof wire connectors (grease caps) to secure the wire splices.
- Replacing the Diaphragm: If a zone won’t shut off and constantly weeps water, a tiny piece of grit is likely stuck inside the valve, or the rubber diaphragm has cracked. To fix this, shut off the main water line. Unscrew the top bonnet of the valve (usually secured by 4 to 6 screws). Carefully remove the spring and the rubber diaphragm. Clean out any debris from the valve body, install a matching replacement diaphragm, and reassemble the valve. Tighten the screws evenly in a crisscross pattern to prevent warping the plastic casing.
If your system uses drip lines in some zones, keep in mind that drip valves often include specialized pressure regulators and filters that require distinct maintenance. Learn more about maintaining these setups by reading Stop the Leak and Save Your Garden with Easy Drip Repair.
How to Repair Leaking Underground Irrigation Pipes
Underground pipe leaks are the silent killers of a healthy landscape. They erode your soil, create muddy sinkholes, drown grass roots, and cause massive spikes in your water bill.
Most underground leaks occur on lateral lines (the pipes downstream from the zone valves that are only pressurized when the zone is running). However, a leak on your main line (the pipe before the valves, which is under constant pressure) is a major emergency that requires immediate attention.
Common signs of an underground pipe leak include:
- A sudden drop in water pressure across an entire zone
- Water bubbling up through the grass or soil
- A soft, spongy wet spot in your lawn that never dries out
- Dirt or physical debris shooting out of your sprinkler nozzles
Step-by-Step to Fix Lawn Sprinkler Lateral Lines
Repairing a cracked lateral line is a straightforward DIY project if you take your time. Here is how to do it:
- Step 1: Locate and Expose the Leak. Turn on the zone to find where water is bubbling up. Turn off the water, grab your shovel, and carefully dig out the soil around the leak. Dig at least 6 inches below and around the pipe to give yourself working room.
- Step 2: Cut Out the Damaged Section. Use a specialized PVC pipe cutter or a hacksaw to cut out the cracked section of the pipe. Make clean, straight cuts about 2 inches on either side of the break. Clean any dirt or water off the remaining pipe ends with a dry rag.
- Step 3: Prep the Replacement Pipe. Measure the gap you just cut out. Cut a piece of matching PVC pipe (usually Schedule 40 PVC, matching the diameter of your existing line) slightly shorter than the gap to allow room for your fittings.
- Step 4: Apply Primer and Cement. Apply purple PVC primer to the outside of the old pipe ends and the inside of your slip-fix expansion coupling or standard PVC couplings. Next, apply a generous layer of medium gray PVC solvent cement over the primer.
- Step 5: Install the New Section. Push the replacement pipe and couplings onto the existing line. If you are using a slip-fix (a telescoping repair coupling), extend it until it locks securely into the opposite side of the cut pipe. Give the fittings a quarter-turn as you push them together to spread the glue evenly, and hold them firmly for 30 seconds.
- Step 6: Test and Backfill. Let the cement dry completely (usually 30 to 60 minutes depending on local temperature). Turn the water back on to pressurize the line and check for any leaks before backfilling the dirt.
For more details on handling pipe cuts and choosing the right glues, check out How to Repair a Sprinkler.
Preventing Future Sprinkler Damage and Winterizing
The easiest way to fix a lawn sprinkler is to prevent it from breaking in the first place. Up to 80% of broken sprinkler risers are caused by physical impacts from lawn mowers, edgers, and heavy foot traffic.
You can protect your system from these common hazards with a few smart installation choices:
- Set Heads Below Grade: Ensure your sprinkler heads are installed so the top of the cap sits flush with or slightly below the soil level. If the head sits too high, it is only a matter of time before a lawn mower blade strikes it.
- Install Swing Joints: Instead of threading your sprinkler head directly onto a rigid PVC riser, use an articulated swing joint (funny pipe). Swing joints act like shock absorbers. If a mower rolls over the head, the flexible tubing bends under the pressure instead of snapping the underground pipe fitting.
- Upgrade to a Smart Controller: Modern smart controllers adjust your watering schedule automatically based on real-time local weather data. This prevents overwatering, reduces system wear and tear, and saves you money. Check out our guide on how to Don’t Let Your Money Evaporate with These Torrance Smart Controllers to see how these devices optimize water use in our coastal climate.
- Seasonal Maintenance: While we don’t experience deep ground freezes in Southern California, we still need to prep our systems for seasonal changes. Run a quick manual test of your system once a month to spot misalignments and minor leaks before they turn into expensive emergencies.
Frequently Asked Questions about Sprinkler Repair
How much does it cost to repair a sprinkler system?
Most professional sprinkler repairs land between $125 and $450, with the average cost hovering around $250 per year. Replacing a single broken head yourself is highly affordable, usually costing between $3 and $25 for parts. However, ignoring a broken head can lead to massive water waste, costing you hundreds of dollars in utility bills over just a few months.
Can I mix different brands of sprinkler heads on the same zone?
While you can physically mix brands like Rain Bird, Hunter, and Orbit on the same zone, we do not recommend it. Different manufacturers design their nozzles with different precipitation rates and spray patterns. Mixing them can create pressure imbalances across the zone, leaving you with soggy mud in some areas and dry, brown patches in others. For the most balanced coverage, stick to the same brand and series throughout each zone.
When should I call a professional for irrigation repair?
If you are dealing with a simple broken head or a clogged nozzle, a DIY fix is quick and easy. However, you should call a licensed professional if you encounter:
- Main line breaks under constant high pressure
- Complex electrical troubleshooting at the controller or valve manifold
- Issues with your backflow preventer assembly (which must be certified by a licensed specialist to protect your home’s drinking water)
- Tree root intrusion that has crushed underground lines across multiple zones
To learn more about how professional management can save your lawn and your budget, read Irrigation Services: A Smart Solution for Your Landscape.
Conclusion
Taking care of your lawn shouldn’t feel like a constant battle against dry patches and high water bills. With a basic understanding of how your system works, you can easily fix a lawn sprinkler head, clear out clogged valves, and repair minor pipe leaks on your own.
But if you find yourself staring at a muddy trench, dealing with electrical faults, or simply wanting to upgrade your property with a highly efficient, modern system, we are here to help. At Southern California Tree & Landscape, we have been family-owned since 1991, serving homeowners and businesses across Torrance, Covina, Harbor City, and the South Bay. Our experienced crews and ISA-certified arborists are ready to handle everything from rapid emergency repairs to complete custom installations.
Ready to get your yard looking its absolute best? Explore Our Services: Irrigation and contact us today to request a free quote!