
How to Choose a Garden Soil Amendment
Start with the soil, not the bag of amendments. Test its pH and nutrients, then check its texture: clay feels sticky, sand feels gritty, and loam holds together loosely. For most garden beds, spread 1 to 2 inches of finished compost and mix it into the top 6 to 8 inches when the soil is dry enough to crumble. Add lime or sulfur only if your soil test calls for it.
I’m Troy Basmajian, president of Southern California Tree & Landscape. Over the past decade, I’ve helped lead landscape and irrigation services across Southern California; this guide will help you choose a garden soil amendment that fits your site.
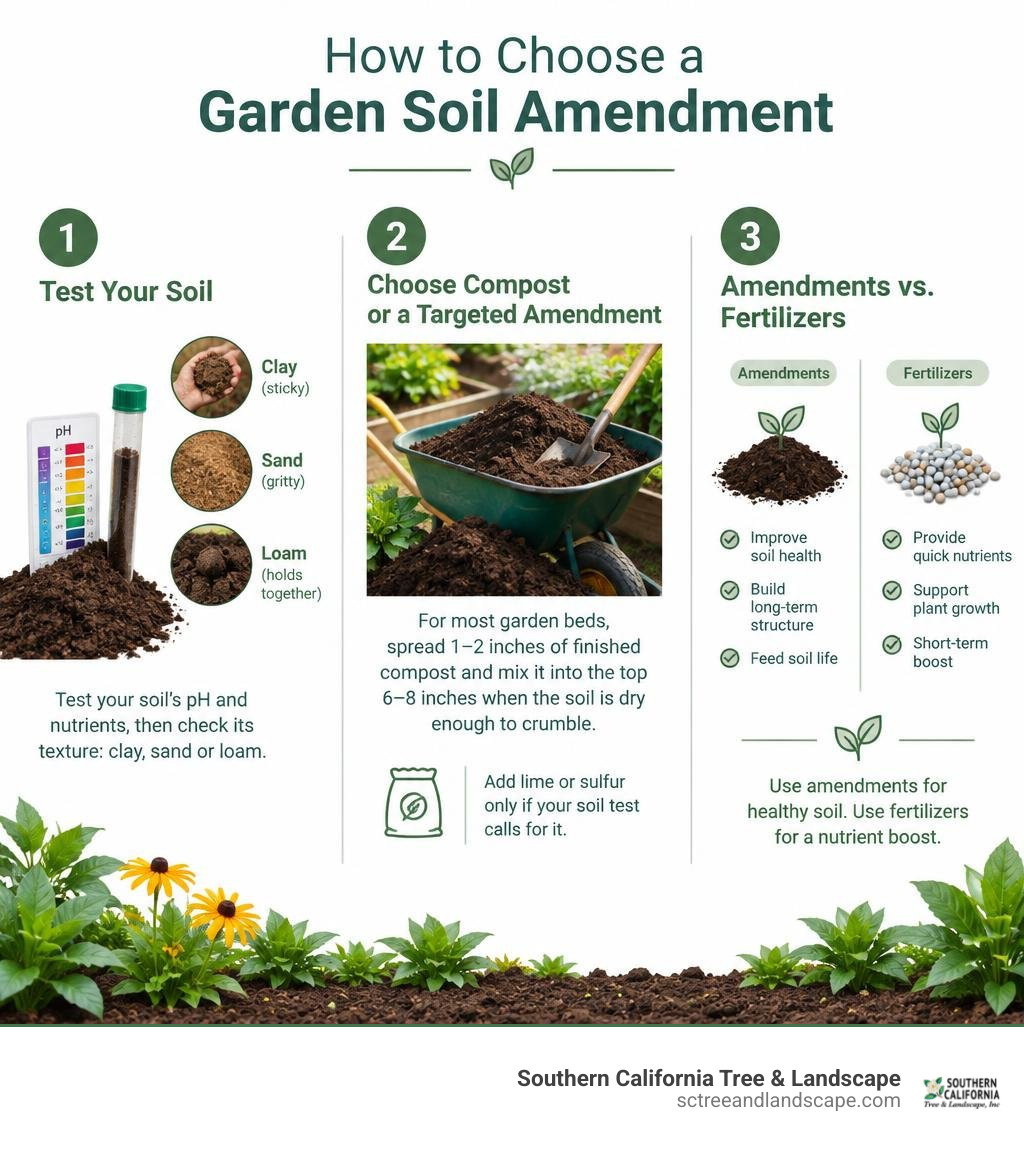
Garden soil amendment word roundup:
Soil Amendments vs. Fertilizers: What Every Gardener Needs to Know
Many property owners assume that applying fertilizer solves all root-level issues. While fertilizers feed plants directly by delivering specific elemental nutrients like nitrogen, phosphorus, and potassium, they do little to cure compacted, lifeless dirt.
A soil amendment conditions the soil itself. Amendments alter physical properties, enhance cation exchange capacity, improve macropore and micropore aeration, and foster biological activity within the native root zone. When soil has good structural tilth, plant roots expand freely, moisture penetrates deeply instead of running off, and native microbes convert bound minerals into plant-accessible food.
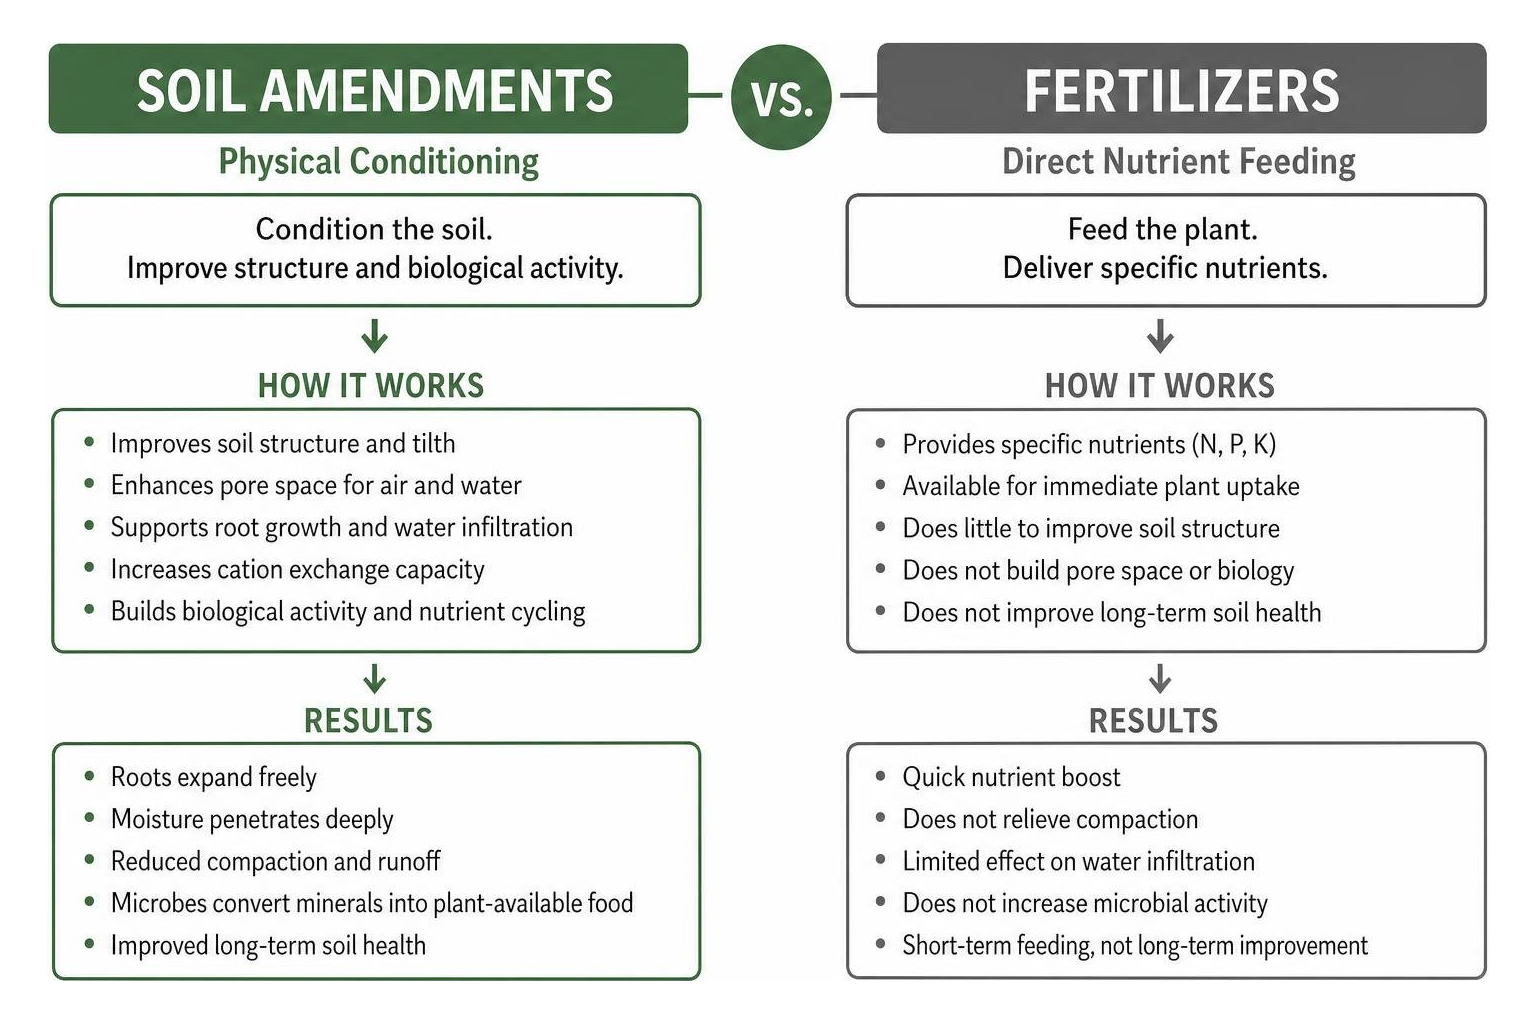
Native soil naturally contains roughly 50 percent solid particles and 50 percent pore space divided between air and water. Heavy foot traffic, site construction, and improper watering collapse those vital spaces. Incorporating regular soil conditioning into routine landscape care and maintenance restores structural balance. According to the WSU Extension guide to soils and fertilizers, healthy topsoil contains between 100 million and 1 billion beneficial bacteria per gram, driving natural nutrient cycling that synthetic fertilizers simply cannot replicate.
How to Test and Assess Your Soil Before Adding Amendments
Before purchasing truckloads of material, you need to assess your native soil profile. Adding materials blindly can exacerbate drainage issues, skew chemical balances, or create salt toxicity.
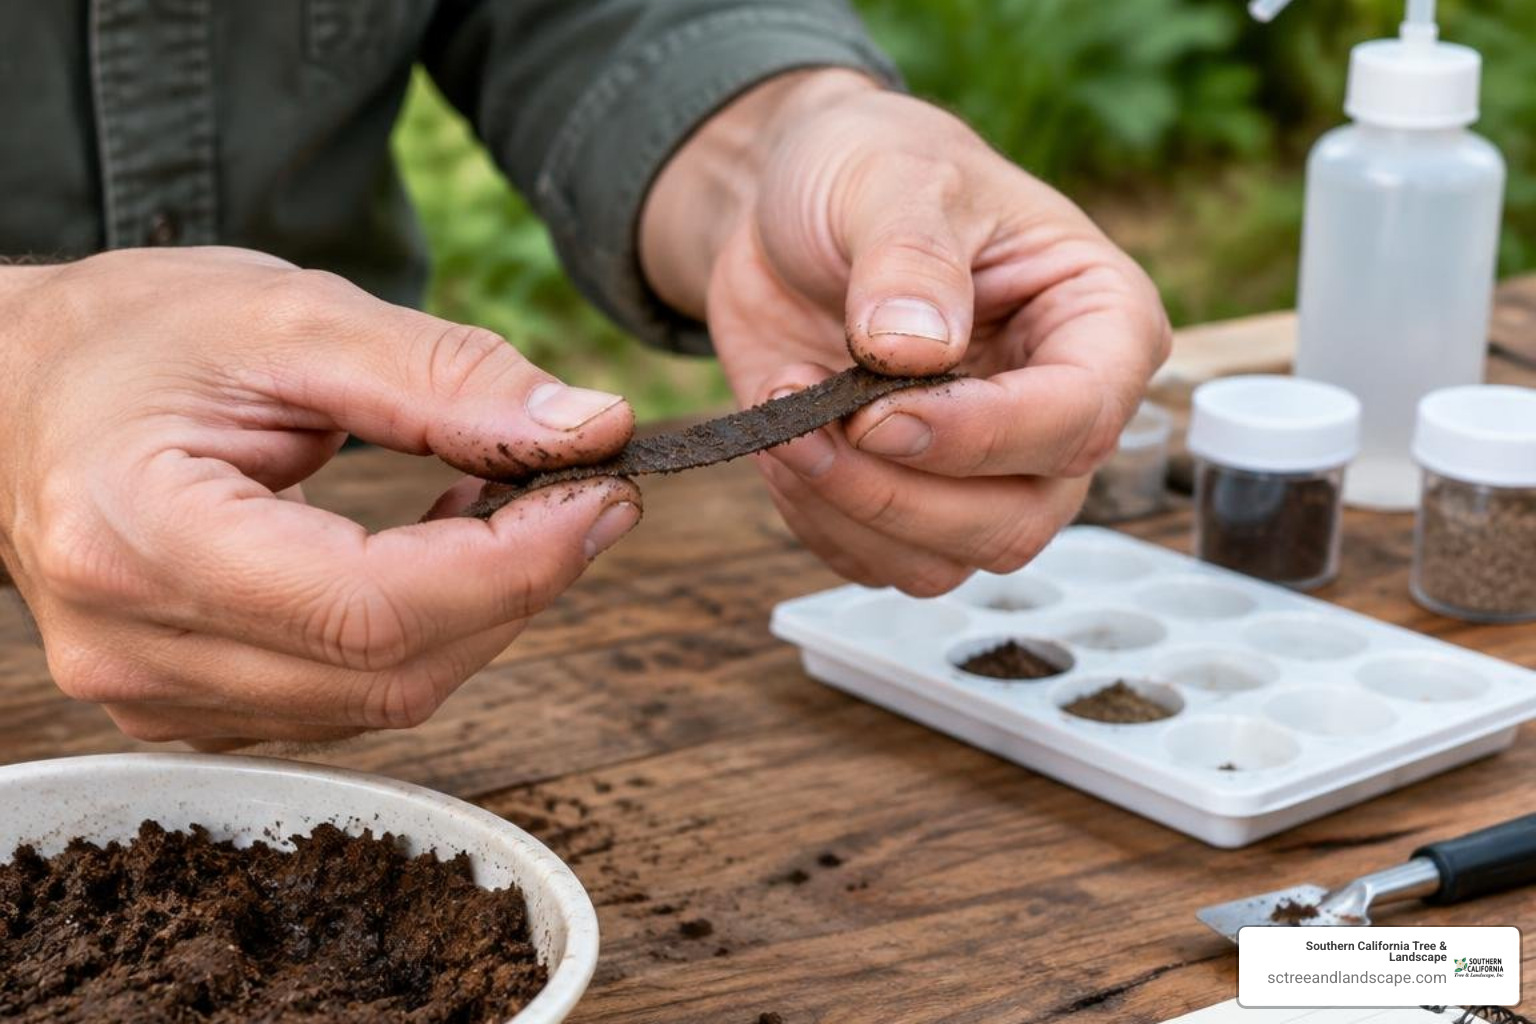
Begin with simple physical diagnostic tests:
- The Texture Ribbon Test: Take a handful of soil, moisten it, and knead it into a ball. Squeeze the soil out between your thumb and forefinger, pushing it upward into a uniform ribbon.
- Clay: Forms a flexible, shiny ribbon longer than two inches before breaking.
- Loam: Forms a fragile ribbon between one and two inches that feels smooth and balanced.
- Sand: Crumbles immediately, feels gritty, and fails to form a ribbon.
- The Jar Test: Place soil in a clear glass quart jar with water and a drop of liquid dish soap. Shake vigorously for 60 seconds, then let it settle. Sand particles settle out in one minute, silt settles in two hours, and fine clay takes 24 to 48 hours to form distinct layers.
- Percolation and Compaction Check: Dig a hole 12 inches deep and 12 inches wide. Fill it with water, let it drain completely, then fill it again and track the drop per hour. Drainage between one and two inches per hour is ideal. Water standing for more than 24 hours signals severe subsoil compaction.
In urban parcels across South Bay, Torrance, and Covina, historical building practices or lead paint from older structures can impact planting safety. If you plan to grow edible crops, submit a representative sample to a certified laboratory. Follow the UC Master Gardener guidelines for soil management to verify baseline pH, organic content, and ensure lead concentrations fall well below hazardous food-crop thresholds.
Selecting the Best Garden Soil Amendment for Your Specific Soil Type
Every soil texture requires a tailored approach to achieve optimal moisture capacity and gas exchange.
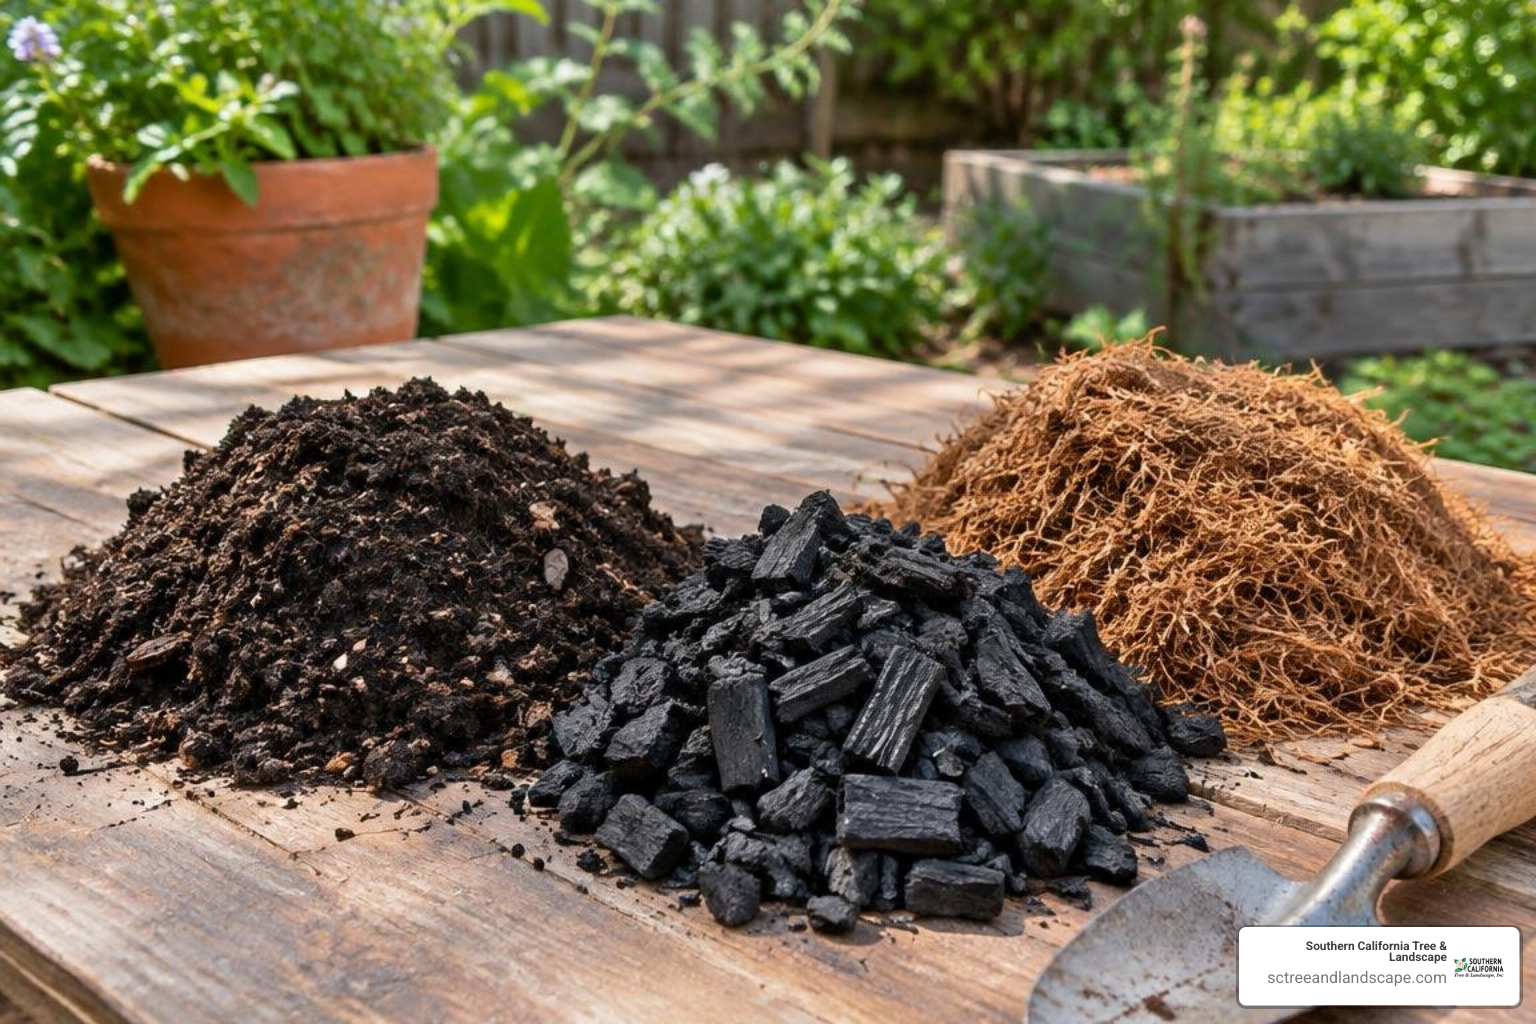
Whether you are preparing a lush vegetable patch or installing a drought-tolerant yard, review the research on choosing soil amendments to select the right material for your planting goals.
| Amendment Type | Best For | Typical Application Rate | Primary Benefits | Key Cautions |
|---|---|---|---|---|
| Finished Compost | All soil types (Clay, Sand, Loam) | 1 to 2 inches worked 6 to 8 inches deep | Increases water retention, improves aggregation and microbial life | Check for low electrical conductivity (salts) |
| Aged Pine Bark Fines | Dense clay, Acid-loving plantings | 1 to 2 inches incorporated evenly | Generates persistent macropores, resists rapid breakdown | Can cause nitrogen tie-up if unaged |
| Coconut Coir | Sandy beds, Raised planters | 1 to 2 inches mixed into rooting area | Retains moisture, sustainable peat alternative, neutral pH | Rinse to remove residual sodium before heavy use |
| Worm Castings | High-production vegetable gardens | 0.25 to 0.5 inches top-dressed or blended | Supplies beneficial enzymes, high cation exchange capacity | Costly for large landscape scale applications |
| Biochar (Pre-charged) | Porous sand, Depleted native dirt | 5% to 10% total volume blend | Creates permanent habitat for mycorrhizae and nutrients | Must be charged with compost or nitrogen before application |
| Dolomitic Lime | Acidic soils (pH < 5.8) | Per soil test (typically 20 to 50 lbs / 1,000 sq ft) | Raises pH, supplies calcium and magnesium | Takes 6 to 8 weeks to alter pH; do not over-apply |
| Elemental Sulfur | Alkaline soils (pH > 7.5) | Per soil test (typically 10 to 30 lbs / 1,000 sq ft) | Lowers pH, enhances iron and manganese uptake | Requires warm soil temperatures and active soil bacteria |
| Gypsum | Sodic soils high in sodium | 20 to 40 lbs / 1,000 sq ft | Displaces sodium ions, improves aggregation without changing pH | Ineffective for breaking up ordinary non-sodic clay |
Organic Garden Soil Amendment Choices for Clay, Sand, and Loam
Organic materials serve as the primary fuel source for the soil food web. However, raw organic matter behaves differently than aged, cured humus. Approximately half of fresh, uncomposted organic matter is lost as carbon dioxide gas within the first 60 days after incorporation. Composted organic matter breaks down gradually, losing about half its volume over one to two years, which delivers structural stability.
For homeowners pairing resilient landscapes with smart plant selections for dry spells, choose from these proven materials:
- Finished Compost: The gold standard. Fully cured compost maintains a stable carbon-to-nitrogen ratio between 15:1 and 20:1. As detailed in the UGA Extension guide on composting, properly managed piles generate heat between 131 and 160 degrees Fahrenheit, eliminating weed seeds and pathogens.
- Worm Castings (Vermicompost): Rich in plant-growth enzymes and water-soluble minerals, worm castings boost cation exchange capacity without risking plant burn.
- Coconut Coir: A renewable byproduct of coconut harvesting, coir serves as an eco-friendly replacement for peat moss. It absorbs up to nine times its weight in water, helping sandy soils retain hydration in hot inland valleys.
- Charged Biochar: Biochar is porous, high-carbon charcoal. Never apply pure, raw biochar directly to your garden, as its high internal surface area will absorb existing soil nitrogen. Charge it first by blending it with active compost or liquid organic feed for two to three weeks.
- Deciduous Leaf Mold: Shredded, decomposed leaves provide structural aeration and potassium, delivering between 0.3 and 3 pounds of potash per 1,000 square feet with a 2-inch application.
Mineral and Inorganic Garden Soil Amendment Options for Drainage and pH
When addressing extreme pH imbalances or persistent container aeration, inorganic and mineral amendments provide stable solutions:
- Dolomitic Lime and Calcitic Lime: Applied to increase pH in acidic soils. Dolomitic forms add magnesium alongside calcium.
- Elemental Sulfur: Gradually lowers soil pH as native Thiobacillus bacteria oxidize the sulfur into plant-usable sulfate.
- Perlite and Vermiculite: Perlite is expanded volcanic glass that maintains drainage channels. Vermiculite is an expanded mica mineral that holds moisture and dissolved nutrients in seedling and container mixes.
- Greensand and Rock Phosphate: Naturally occurring mineral deposits that slowly release trace minerals, potassium, and phosphorus over several growing seasons without leaching into local waterways.
- Gypsum (Calcium Sulfate): Useful for displacing excess sodium in coastal or reclaimed-water landscapes. For regular garden soils, refer to the CSU Extension guidelines on compost, which note that organic matter is far more effective for improving structural aggregation than gypsum.
Step-by-Step Field Guide: How and When to Apply Soil Amendments
Proper application requires correct timing, even spreading, and gentle incorporation to protect soil biology.
Follow this step-by-step procedure:
- Wait for Favorable Soil Moisture: Never turn or till waterlogged soil. Squeeze a handful of dirt into a ball; if it drops water or stays a slick, sticky clump when prodded, allow it to dry. It should crumble cleanly under light thumb pressure.
- Clear and Weed: Clear surface weed cover and stubborn roots. For raised beds or new ground conversions, lay down plain unprinted corrugated cardboard to smother weeds naturally.
- Spread Amendments Uniformly: Apply 1 to 2 inches of composted organic matter across the bed surface. For a 1,000-square-foot lawn or planting area, this equals approximately 3 to 6 cubic yards (or up to 2,000 pounds of rotted compost). One inch of quality compost with 1,000 parts per million nitrogen supplies about 1 pound of water-soluble nitrogen per 1,000 square feet.
- Incorporate to Root Depth: Using a broadfork, spading fork, or low-speed tiller, work the amendments into the upper 6 to 8 inches of the soil bed. For newly established beds, working down 8 to 12 inches promotes deep root penetration.
- No-Till Alternative: In established landscape beds, spread a 2-inch topdressing of compost directly under mulch. Earthworms and soil arthropods will integrate the organic matter downward into root zones without disturbing existing root systems.
- Settle and Water: Water the amended area thoroughly using low-flow irrigation to activate microbial life. Allow the soil profile to settle for three to five days before planting.
If you are building elevated timber or masonry planters, review the University of Maryland Extension recommendations for raised beds to establish a base blend containing 25 to 50 percent organic matter by volume, combined with topsoil. If your outdoor project involves site grading, hardscape integration, or large plantings, consult our comprehensive guide to landscape installation for proper sequencing.
Critical Soil Amending Mistakes to Avoid
Even good intentions can backfire if you choose the wrong materials or use improper techniques:
- Incorporating Raw Sawdust and Wood Shavings: Fresh, uncomposted wood particles have an extremely wide carbon-to-nitrogen ratio (up to 400:1 to 600:1). Decomposing bacteria will consume all available soil nitrogen, starving nearby plants.
- Spreading Fresh, Unaged Manure: Uncomposted animal waste contains high ammonia salts that burn tender root hairs, introduce viable weed seeds, and carry harmful bacterial pathogens. Manure should be composted hot or applied at least 90 to 120 days prior to harvesting food crops.
- Adding Sand to Heavy Native Clay: Adding fine builders’ sand to clay soil without adding massive volumes of coarse organic material creates a dense, concrete-like mixture. Clay particles fill the spaces between sand grains, eliminating all pore space.
- Over-Liming Without Testing: Excess lime spikes soil pH, precipitating micronutrients like iron, zinc, and manganese into insoluble forms that cause severe leaf chlorosis.
- Working Wet Soil: Rototilling wet clay shears soil aggregates, creating hardpan compaction layers that resist root and water penetration.
If you are planning major structural changes to your yard, incorporating healthy soil preparation into a custom landscape design ensures plant vitality from day one.
Frequently Asked Questions About Soil Amending
How long does lime take to adjust soil pH?
Agricultural and dolomitic lime take 6 to 8 weeks to chemically react with soil moisture and alter soil pH. Because calcium carbonate dissolves slowly, apply lime in the fall or late winter so soil chemistry stabilizes before spring planting. Pelletized lime reacts slightly faster, but typically requires annual monitoring and reapplication.
Can you add sand directly to heavy clay soil to improve drainage?
No. Adding sand directly to native clay ruins soil structure. The small, flat clay platelets pack tightly around the larger sand grains, resulting in a dense, hard mixture with minimal pore space. To loosen dense clay, add high-quality compost, aged pine bark fines, or leaf mold.
What is the ideal soil pH for a productive vegetable garden?
The vegetable garden should be slightly acidic with a pH level ranging from 5.8 to 6.8 (with 6.0 to 7.0 accommodating most general vegetables and ornamental flowers). Within this range, essential macronutrients and trace minerals remain soluble and accessible for root uptake, while beneficial soil microorganisms operate at peak efficiency.
Conclusion
Healthy landscapes begin underground. By evaluating your native soil texture, testing for baseline pH, and incorporating cured organic matter on an annual schedule, you create resilient root systems that conserve water, resist pests, and support vigorous growth year-round.
At Southern California Tree & Landscape, we have provided family-owned landscape design, complete installation, precision irrigation, and certified arborist tree care across Torrance, Covina, Harbor City, and the wider South Bay since 1991. Whether you are addressing stubborn clay soil or planning a complete backyard oasis design in Torrance, our team is here to help your outdoor spaces flourish. Reach out today to schedule a consultation with our landscape specialists.