
Avoid Costly Outdoor Fireplace Installation Mistakes
A safe, durable outdoor fireplace starts with the right plan: choose an outdoor-rated unit, confirm permits and HOA rules, place it clear of structures and trees, and build a reinforced foundation sized for its full weight. Then follow the manufacturer’s clearance, hearth, chimney, and curing rules exactly – especially for wood-burning or gas-fired models.
The biggest costly mistakes happen before the first block is set. A standard patio slab may not support a masonry fireplace that can weigh thousands of pounds once veneered. Poor site drainage, an undersized footing, or a chimney designed without regard for wind can lead to cracking, frost movement, or smoke rolling back into the seating area.
For Southern California properties, also check local zoning, fire-safety restrictions, utility requirements, and HOA guidelines before work begins. A modular, pre-engineered kit can simplify assembly and help produce reliable draft, but it still needs a level noncombustible base, proper clearances, and qualified help for gas piping or electrical connections.
I am Troy Basmajian, President of Southern California Tree & Landscape, and I help property owners plan durable, functional outdoor spaces through thoughtful landscape and hardscape coordination. Our experience with outdoor fireplace installation planning supports safer placement, better site preparation, and a finished space that fits the property for years to come.
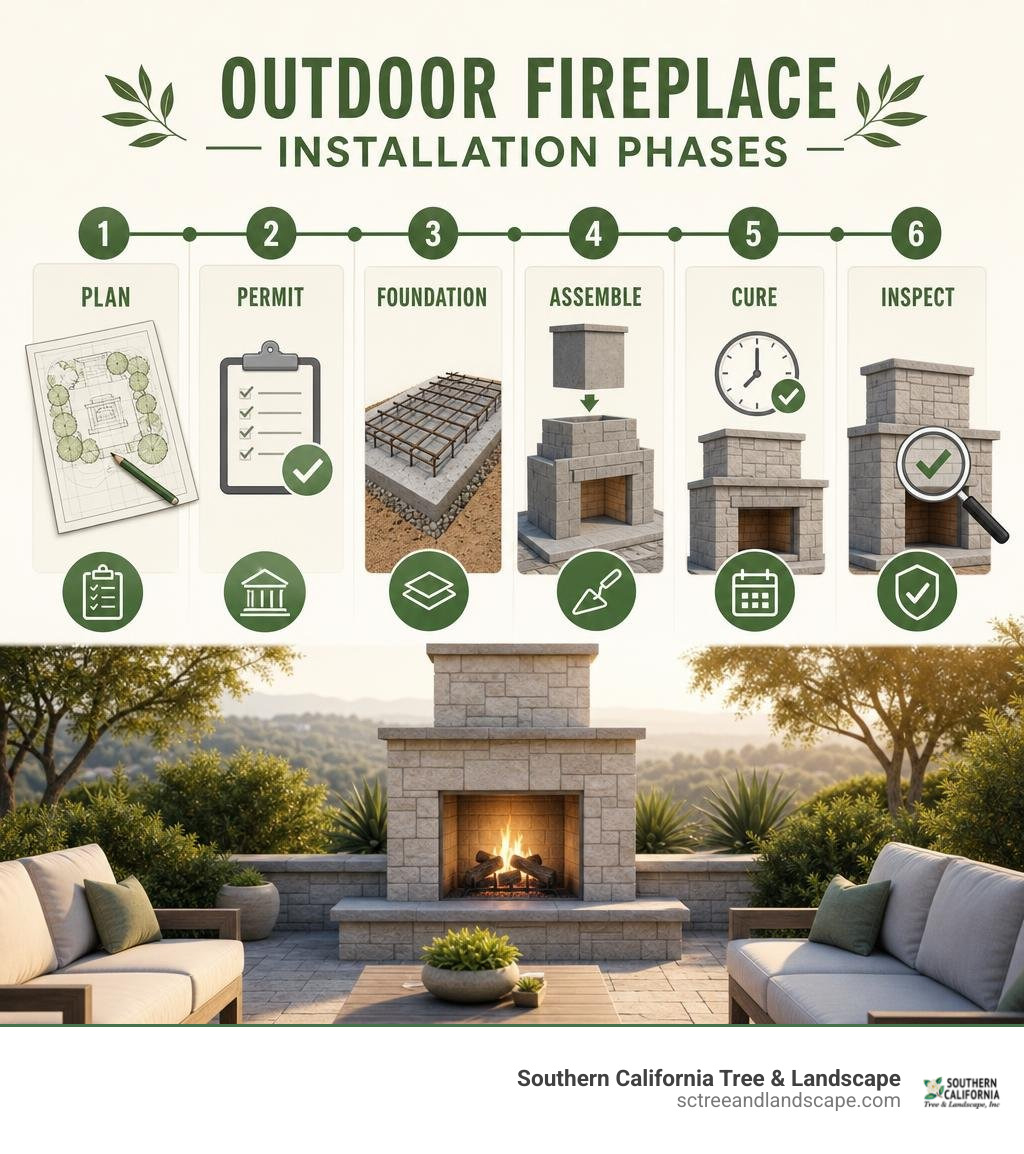
Basic outdoor fireplace installation glossary:
Planning Your Outdoor Fireplace Installation: Types, Location, and Codes

When homeowners across the South Bay, Torrance, and Covina decide to upgrade their yards, an outdoor fireplace is often at the top of the wish list. An outdoor fireplace can increase property value by as much as 12 percent while creating a stunning architectural anchor for family gatherings. However, successful planning requires balancing structural engineering, microclimate awareness, and local municipal mandates.
A major pitfall is placing the unit without analyzing prevailing wind patterns. If wind regularly blows directly into the firebox opening, smoke rolls right out into your seating area instead of exiting up the flue. Proper site selection ensures that the back or side of the fireplace faces the prevailing breeze.
Additionally, you must maintain a safe distance from property boundaries, mature tree canopies, and living spaces. As a rule of thumb, keeping the fireplace structure at least 10 feet from combustible structures, property lines, and overhanging trees is critical. If you are balancing hardscaping elements with lush garden beds, integrating your project into a cohesive custom landscape design ensures the hearth complements pathways, privacy plantings, and patio seating without crowding the yard.
Navigating municipal building codes and zoning laws in Southern California is equally essential. Permitting departments require detailed plan submissions outlining chimney heights, gas line plumbing, electrical trenching, and property line setbacks. Skipping this step can lead to costly fines or code enforcement orders to tear down unpermitted masonry.
Fuel Choices: Wood-Burning, Natural Gas, and Electric
Choosing the right fuel source shapes the entire construction process, from footing requirements to ongoing utility costs.
- Wood-Burning Fireplaces: Traditional wood units provide authentic crackling ambience, high radiant heat output, and classic rustic style. They require dedicated chimney stacks, spark arrestors, regular ash clearing, and dry firewood storage.
- Natural Gas / Liquid Propane (LP) Fireplaces: Gas-fueled units offer push-button convenience, smokeless warmth, and adjustable flame heights. Standard residential gas burners output between 40,000 and 80,000 BTU per hour, which easily warms an outdoor seating space down to 50°F. Gas units require certified gas line plumbing, stainless steel burners, and specialized drainage channels.
- Electric Outdoor Fireplaces: Highly versatile for covered patios, electric units deliver instant visual ambience without requiring venting or gas lines. While they provide lower heat output compared to gas or wood, they operate cleanly under patio roofs where open flames are restricted.
| Feature | Wood-Burning Fireplace | Natural Gas / LP Fireplace | Electric Outdoor Fireplace |
|---|---|---|---|
| Venting Needs | Full chimney with flue & spark arrestor | Vent-free or direct vent options | No chimney or venting required |
| Heat Output | High (Varies by timber volume) | 40,000 to 80,000+ BTU/hr | Moderate (approx. 5,000 BTU/hr) |
| Maintenance | High (Ash removal, creosote sweeps) | Low (Annual burner cleaning) | Minimal (Surface wipe-down) |
| Utility Hookups | None | Hard-piped gas line & 120V GFCI | Dedicated outdoor 120V GFCI circuit |
| Safety Clearances | Strict (10 ft from combustible walls) | Moderate (Follow manufacturer specs) | Low (Zero-clearance options) |
Modular Fireplace Kits vs. Custom Masonry Builds
Building from scratch with concrete masonry units (CMU) allows for completely bespoke shapes, but manual masonry requires specialized engineering to establish proper airflow. Many custom builds suffer from improper firebox tapers and shallow smoke chambers, resulting in smoke spillage.
In contrast, modular, pre-engineered fireplace kits are factory-tested under UL 127 safety standards. They arrive with interlocking refractory concrete components engineered with the correct throat-to-flue ratios. Constructing the base of a fireplace kit can be done in as little as 4 to 5 hours, drastically reducing on-site labor while ensuring reliable draft dynamics.
Following a certified outdoor fireplace installation guide allows our teams to lock the structural modules together securely before applying custom stone, brick, or stucco finishes.
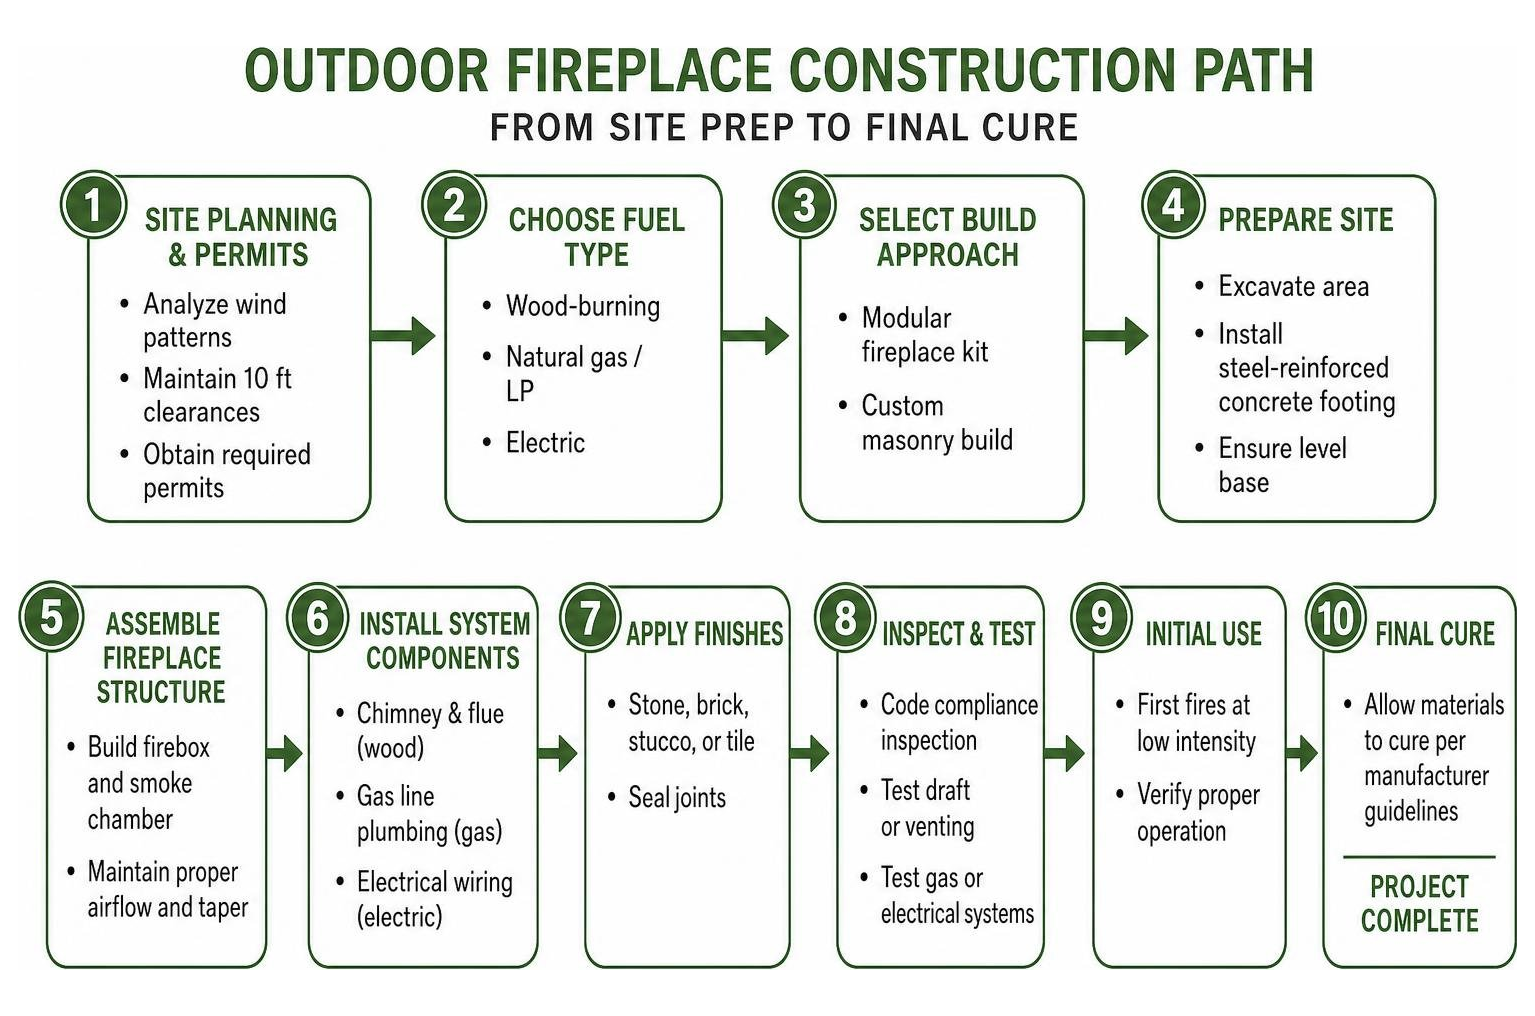
Structural Foundations and Critical Safety Clearances
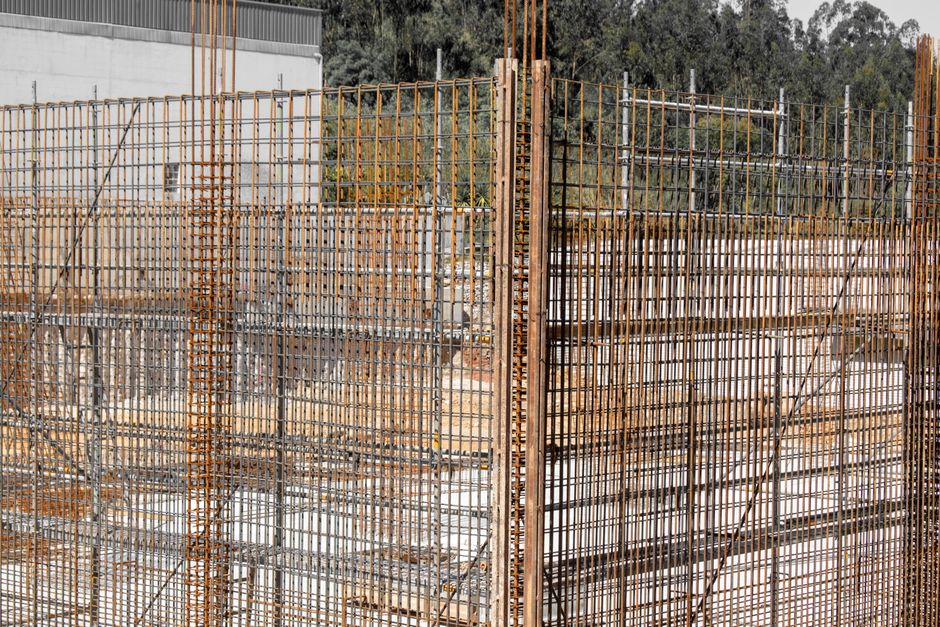
A finished outdoor fireplace is remarkably heavy. Fireplaces can weigh 4,000 lbs once mortared and veneered. Placing this dead load on standard residential patio concrete—which is typically only 3 to 4 inches thick and poured for light foot traffic—leads to catastrophic slab cracking and structural settling.
When coordinating comprehensive landscape design and installation, our crews treat the fireplace foundation as an independent structural footing engineered to handle localized load bearing and soil shifts.
Essential Site Prep for Outdoor Fireplace Installation
Durable construction begins with deep sub-base preparation:
- Excavation: Remove all sod, loose organic topsoil, and unstable clay down to solid subsoil.
- Base Compaction: Lay down 4 to 6 inches of crushed aggregate gravel and compact it mechanically to provide sub-slab drainage.
- Reinforced Slab Pour: Pour a structural monolithic concrete slab. The minimum slab thickness for foundation is 4 to 6 inches for lightweight finishes, increasing to 8 to 18 inches for heavy natural stone veneers.
- Rebar Reinforcement: Tie a grid of #4 steel rebar on 12-inch checkerboard centers to prevent shear cracking.
- Foundation Curing: Allow the poured concrete pad to cure for at least 7 days before setting heavy modular components or building masonry walls.
- Drainage Slopes: Ensure the perimeter paving slopes away from the foundation at a rate of 1/8 to 1/4 inch per foot to shed stormwater away from the hearth.
Critical Safety Clearances for Outdoor Fireplace Installation
Safety standards must be strictly maintained to protect your home and landscape from heat damage or stray sparks:
- Structure Setbacks: Maintain a minimum 10-foot clearance from the firebox opening to combustible walls, wooden fences, and patio furniture.
- Framing Air Gaps: Maintain a minimum clearance to combustibles from firebox and smoke chamber of 1 inch (or up to 2 inches per manufacturer guidelines).
- Hearth Extensions: A noncombustible hearth extension must extend 30 inches beyond the front of the firebox and 8 inches to either side to catch falling embers.
- The 2/10 Chimney Rule: If built near an open structure or patio cover, the chimney must extend at least 3 feet above the roof penetration and 2 feet higher than any portion of a building within a 10-foot radius.
- Spark Arrestors: Solid-top chimney caps fitted with wire spark arrestors are mandatory to contain airborne embers and keep winter rains out of the flue.
For complex gas burner setups, reviewing the manufacturer’s technical installation instructions ensures that non-combustible steel framing and emergency shutoff valves comply with national safety codes.
Step-by-Step Construction and Avoiding Costly Mistakes
Assembling an outdoor fireplace demands patience, precision leveling, and thermal-rated materials. Ordinary mortar and standard red clay bricks cannot withstand repeated direct exposure to 2,000°F flames; using them causes spalling, cracking, and eventual structural collapse.
Firebox Geometry, Drafting, and Chimney Construction
Building the core firebox requires adherence to proven masonry physics:
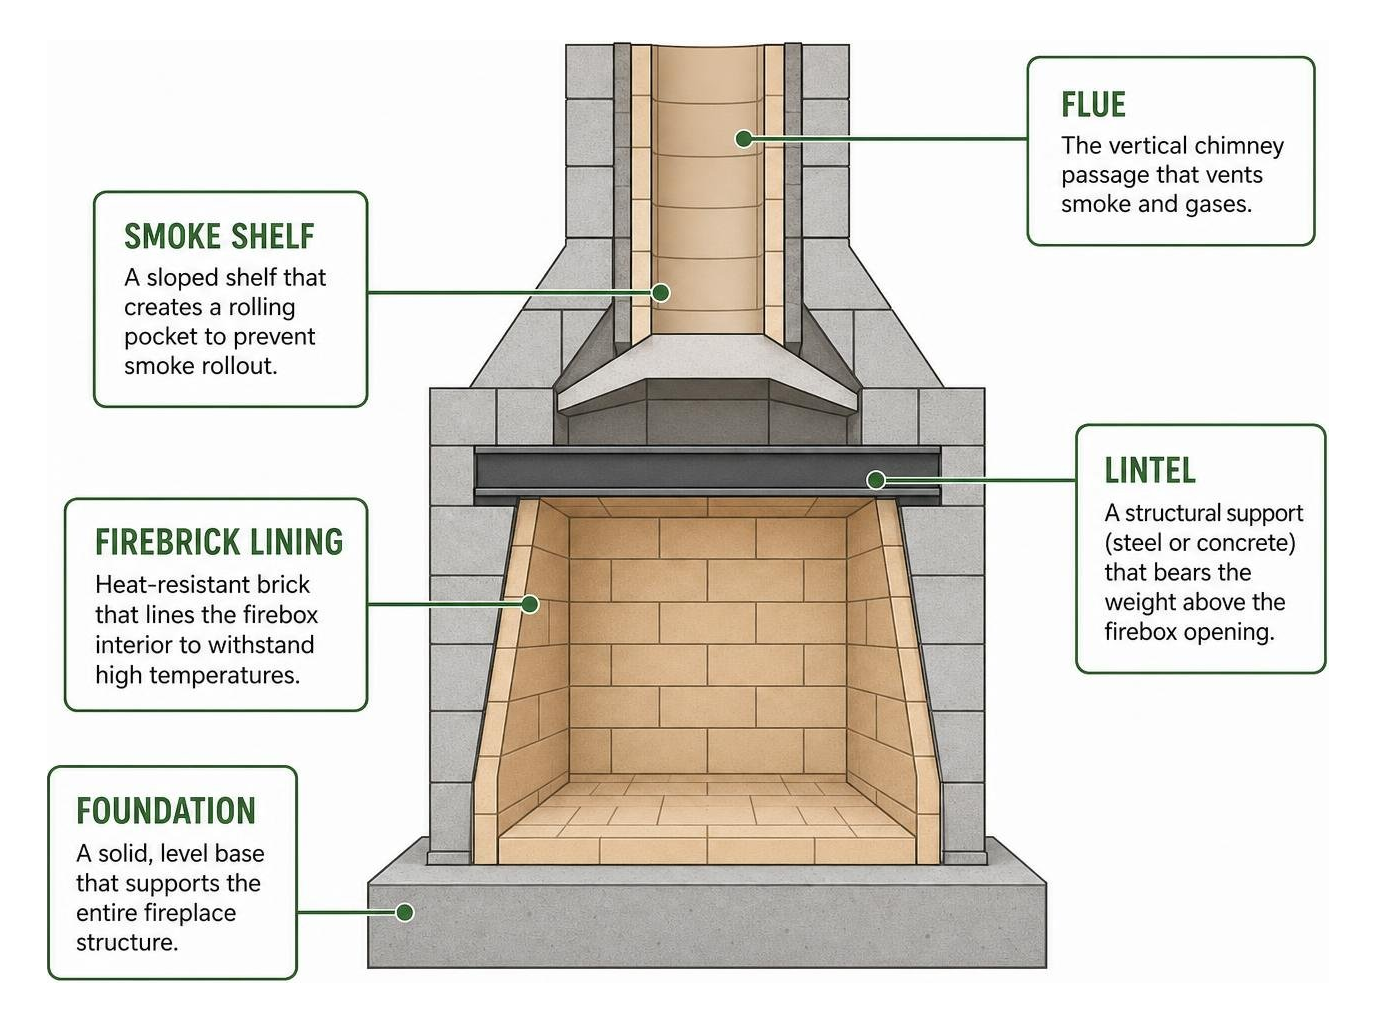
- Setting the Baseplate: Chalk alignment guidelines across the cured concrete slab. Bed the modular baseplate in high-temperature refractory mortar, checking level in all four directions.
- Lining with Refractory Firebrick: Lay split firebrick (ASTM C1261 compliant) inside the firebox using polymer-modified refractory mortar. Keep joints tight at 1/4 inch. For maximum heat reflection, angle the sidewalls outward slightly toward the seating area and angle the rear wall forward.
- Installing the Lintel Support: Bed a structural angle-iron lintel over the firebox opening with mortar to support the upper masonry load.
- Forming the Smoke Chamber and Throat: Assemble the pre-cast throat and smoke shelf. The smoke shelf creates an aerodynamic rolling pocket that redirects downward cold air back up the stack, preventing smoke rollout.
- Stacking the Flue: Stack clay flue liners or interlocking modular chimney blocks, checking for plumb every single course.
Exterior Veneer Application and 30-Day Curing Rules
Once the core block structure is assembled, applying the exterior finish gives the fireplace its personality. Whether you choose stacked ledger stone, manufactured thin stone, smooth Santa Barbara stucco, or brick, correct moisture-barrier preparation is vital:
- Metal Lath and Scratch Coat: When applying stucco or thin stone veneers, attach galvanized diamond metal lath with masonry anchors. Apply a 3/8-inch scratch coat of Type S mortar and score horizontal grooves to ensure mechanical bonding.
- Ground Expansion Gap: Leave a 1/4-inch expansion gap between the bottom edge of the stone veneer and the concrete foundation pad. This prevents seasonal ground shifts from transferring pressure upward into the veneer.
- Breathable Sealer: Apply a silane-siloxane breathable masonry sealer to protect natural stone from moisture absorption without trapping water vapor inside the joints.
- Adhesive vs. Mortar Curing: If using high-strength landscape construction adhesives for modular caps, the adhesive typically takes 24 to 72 hours to fully cure.
- The 30-Day Mortar Rule: For full masonry and refractory mortar assemblies, the fireplace must cure for 30 days before lighting any fires. Rushing this timeline causes water trapped inside the wet mortar to flash into steam, blowing joints apart from the inside. Always start your first fire small using kindling to gently temper the concrete.
Long-Term Maintenance and Fireplace Upgrades
An outdoor fireplace is an investment built to last for decades, provided it receives seasonal care. Salt air, winter downpours, and thermal cycling can gradually wear down exterior joints.
- Creosote Inspections: Inspect the flue at least twice a year. If creosote buildup reaches a thickness of 3 mm (1/8 inch), hire a certified chimney sweep to clean the flue and prevent chimney fires.
- Ash Management: Clean out excess ash periodically, but leave a 1-inch bed of ash on the firebox floor during burning season to provide thermal insulation for underlying bricks.
- Gas Burner Servicing: Clean burner ports using a soft bristle brush to remove spider webs and soot. Inspect pilot assemblies, thermocouple sensors, and emergency shutoff valves annually.
- Mounting Outdoor TVs: If mounting a television above an outdoor fireplace mantel, install an 8-inch deep non-combustible mantel at least 6 inches above the firebox opening to deflect rising heat. Recess the TV into an alcove at least 4 inches deep to shield delicate electronics.
For homeowners looking to integrate hardscape elements, low-voltage lighting, and custom stonework, exploring our services ensures every component of your outdoor living area works in harmony.
Frequently Asked Questions About Outdoor Fireplaces
Do I need a permit to install an outdoor fireplace?
Yes. In most Southern California jurisdictions, building a permanent outdoor masonry fireplace or running gas and electrical utility lines requires municipal building permits. Local building departments review footing depths, structural engineering, chimney heights, and property boundary setbacks. Additionally, properties governed by Homeowners Associations (HOAs) require architectural review approval before excavation begins.
Can I build an outdoor fireplace on an existing concrete patio?
Generally, no. Standard residential patio slabs are only 3 to 4 inches thick and lack the heavy rebar reinforcement needed to support a structure that can weigh 2,000 to 4,000 pounds. Building directly on an existing patio often leads to severe slab cracking and uneven settling. Our teams typically saw-cut and excavate the patio section to pour a dedicated 6- to 12-inch reinforced footing.
How long must an outdoor fireplace cure before the first fire?
A fully mortared masonry fireplace requires a full 28- to 30-day curing period before lighting your first fire. This allows all moisture within the refractory mortar and concrete blocks to evaporate naturally. If you built a modular kit using construction adhesive, the adhesive cures in 24 to 72 hours, but any interior mortared firebrick still requires adequate time to set. Always start with a small conditioning fire using kindling before burning full hardwood logs.
Conclusion
An outdoor fireplace transforms your backyard into a warm, inviting retreat that extends your living space well into cool evenings. Avoiding common mistakes—such as skipping soil compaction, ignoring wind patterns, pouring thin foundations, or rushing the curing process—ensures your hearth remains safe, beautiful, and structurally sound for decades.
At Southern California Tree & Landscape, we bring decades of regional expertise, ISA-certified arborist oversight, and experienced crews to craft outdoor environments tailored to your lifestyle. If you are ready to elevate your South Bay property, start planning by creating your dream backyard oasis in Torrance with our team today.